Create Your First Animation with Quick Presets
Create Your First Animation with Quick Presets
# Create Your First Animation with Quick Presets
**Previous:** [Import Your Design to Aninix](https://aninix.com/guides/import-design-to-aninix) | **Next:** [Create Your First Keyframe Animation](https://aninix.com/guides/create-keyframe-animation)
Once you've imported your design into Aninix, it's time to bring it to life! Quick Presets are the fastest and easiest way to add professional animations to your design elements. No animation experience required!
## What are Quick Presets?
Quick Presets are pre-built animation templates that you can apply instantly to any element in your design. They include popular animation effects like fade-ins, slide-ins, bounces, and more.
## Step 1: Select Your Element
Once you've created your project, you'll see the editor workspace with your selected design elements:
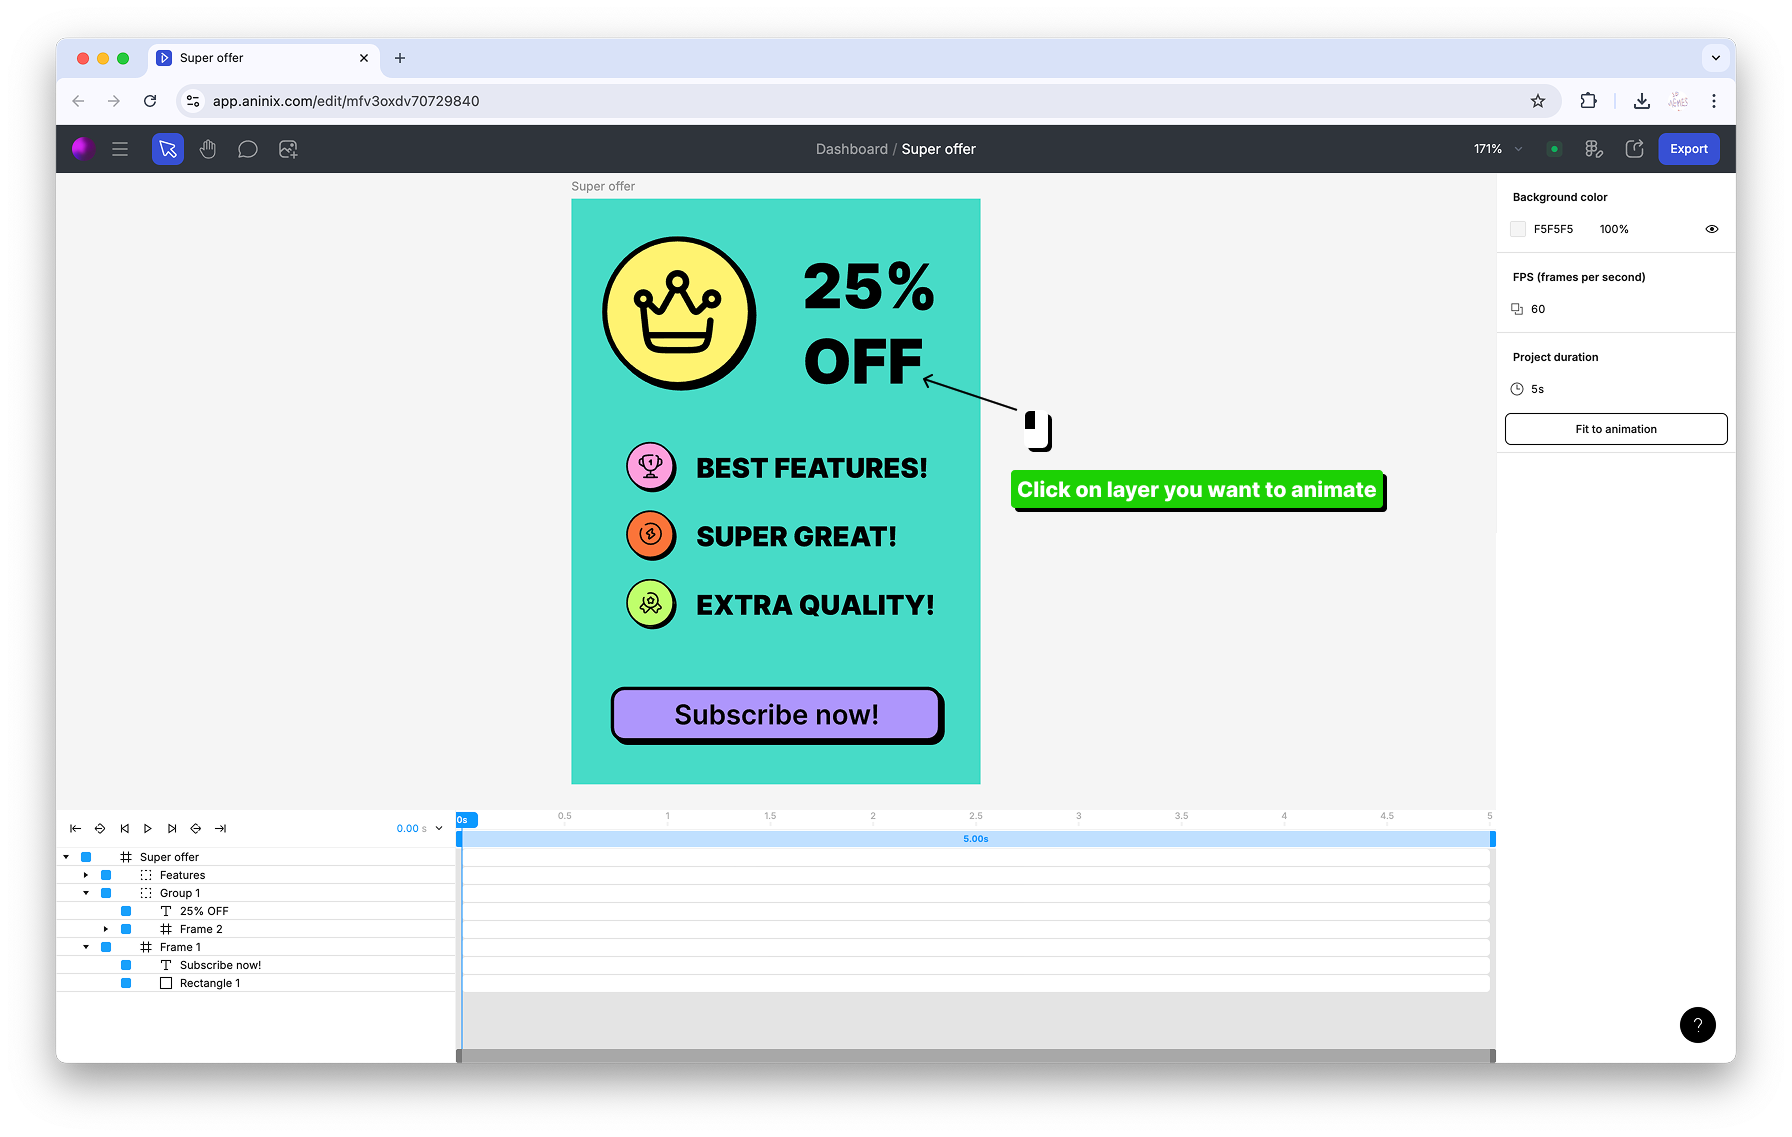
Click on any element in the canvas that you want to animate to select it.
## Step 2: Apply Your First Preset
With an element selected, you'll see the Quick Presets popup appear at the top of the interface:
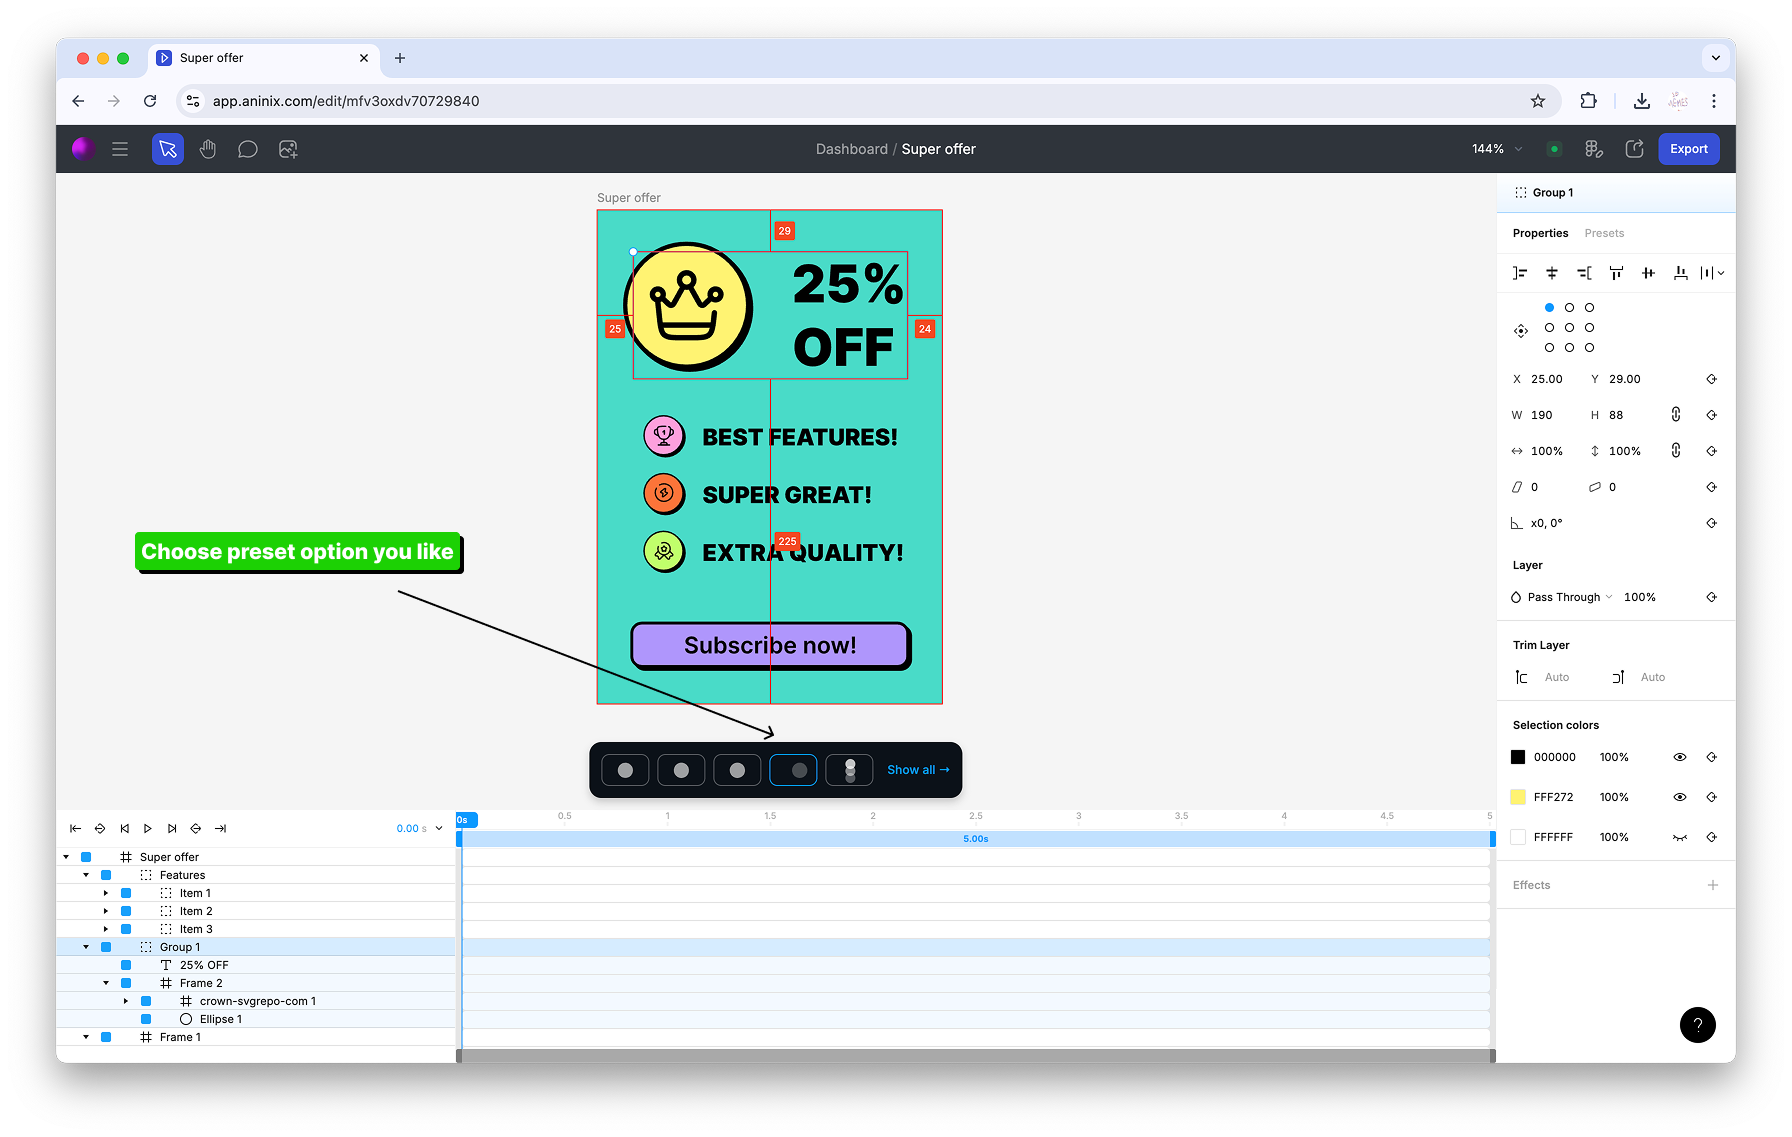
Click on any preset from the Quick Presets popup to apply that animation to your selected element. The animation will be instantly applied and you can preview it by playing your timeline.
## Step 3: Animate Multiple Elements
To create more dynamic animations, you can animate multiple elements at once:
1. Hold `⇧ Shift` and click on additional layers in your design to select multiple elements
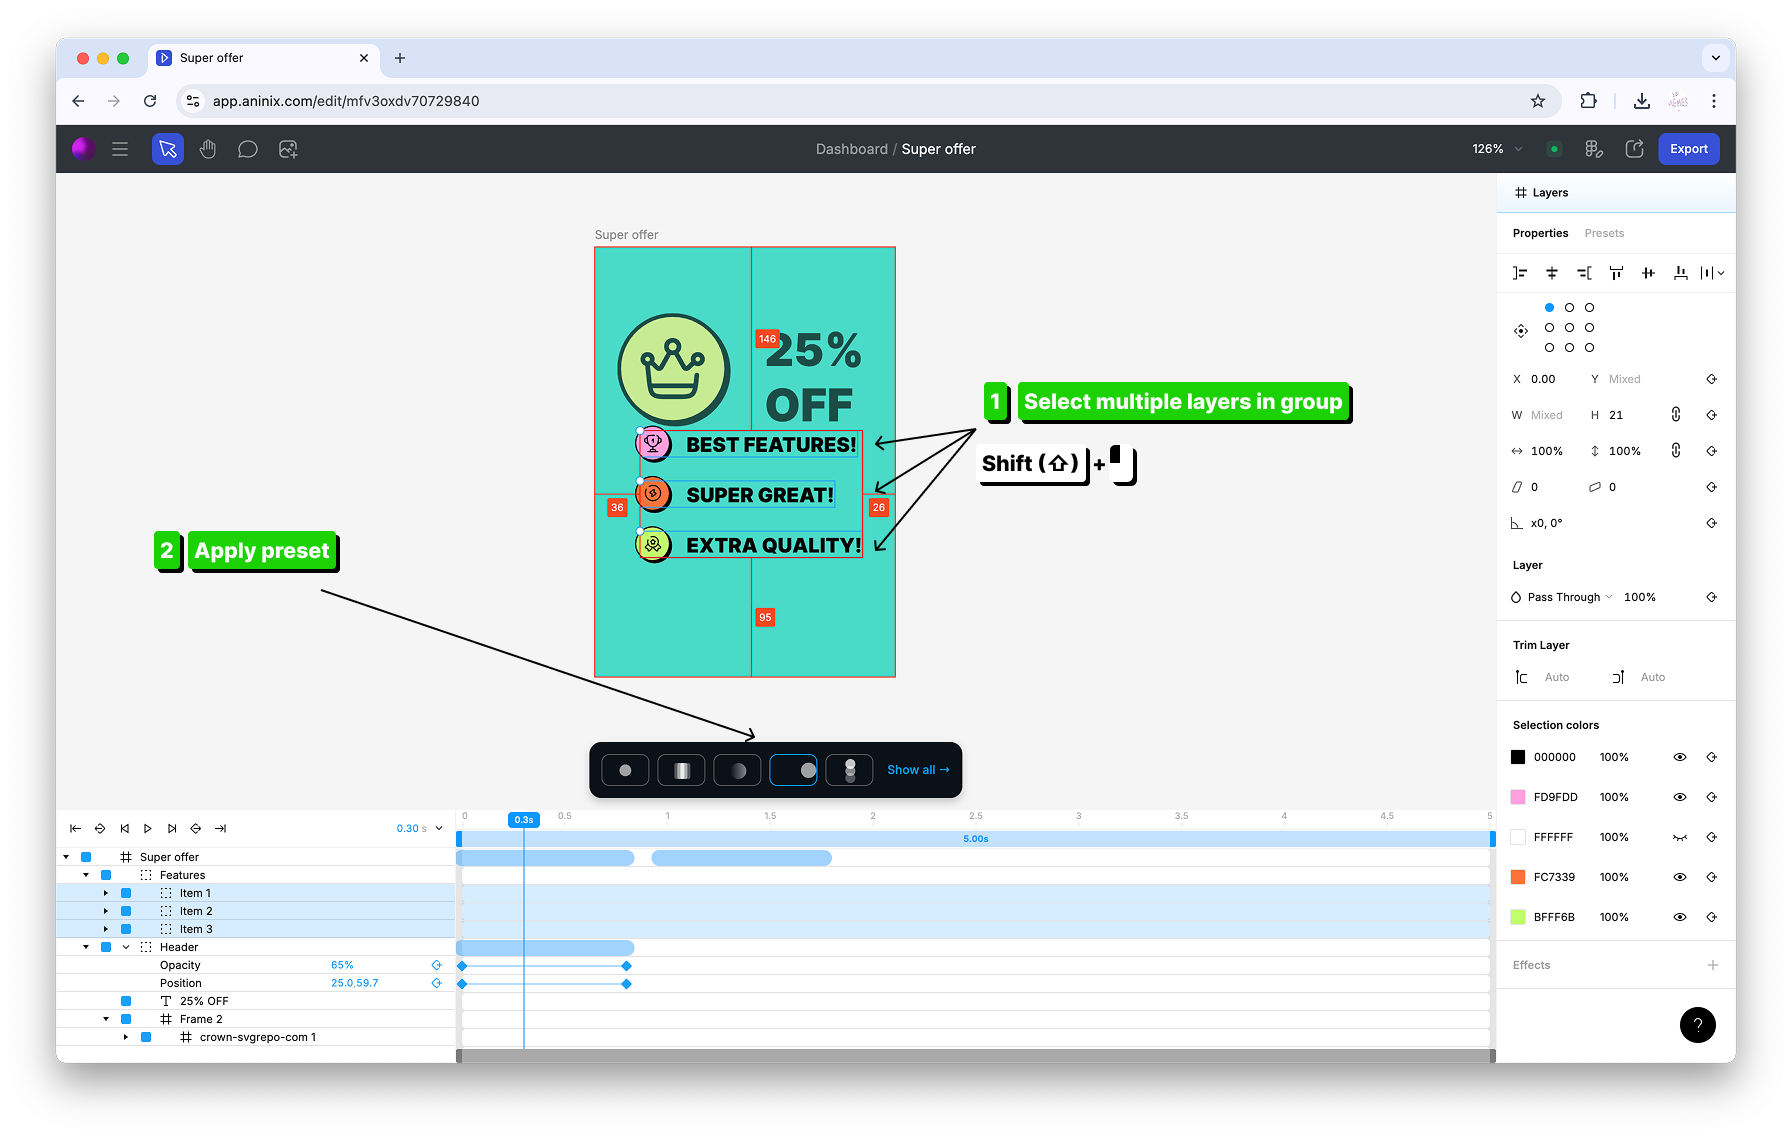
You can select multiple layers by holding `⇧ Shift` and clicking with your mouse on each element you want to include in the animation.
2. With multiple elements selected, apply presets from the Quick Presets popup:
The selected preset animation will be applied to all your selected elements simultaneously, creating cohesive animations across your design.
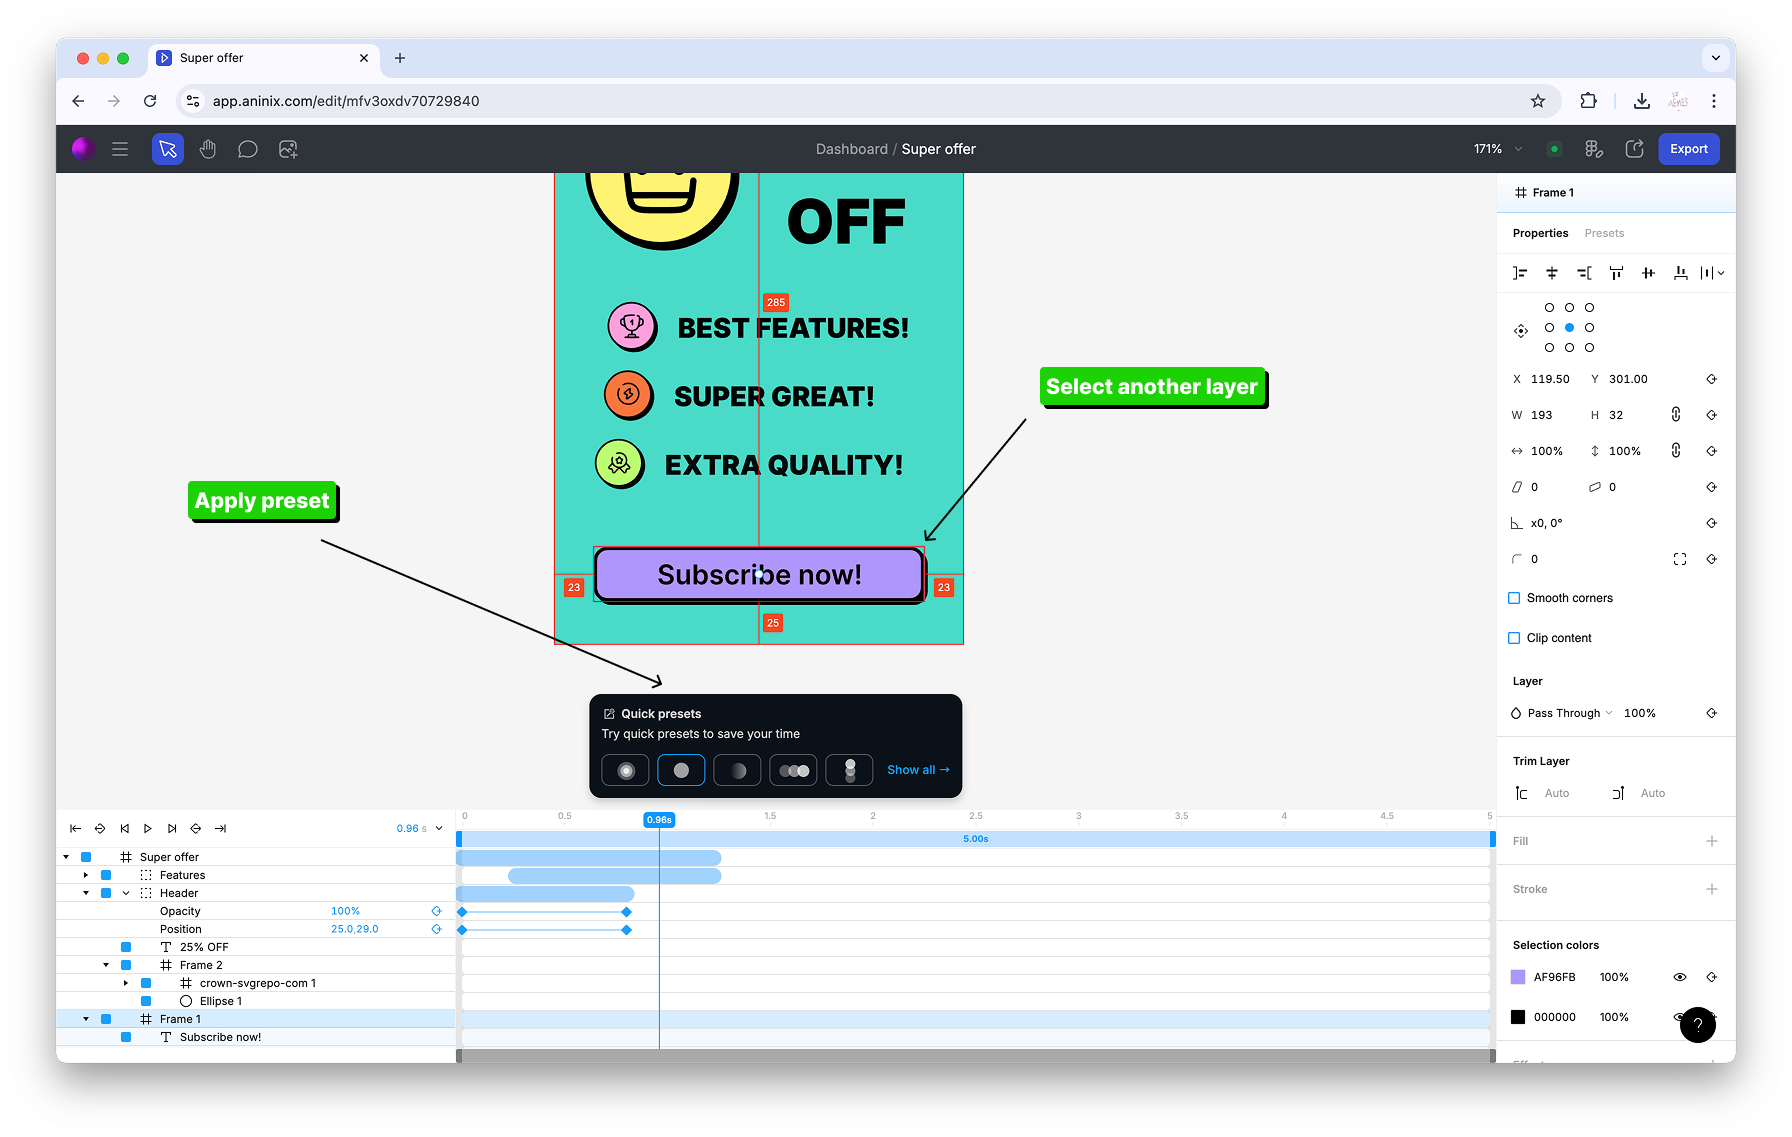
## Step 4: Adjust Your Timeline
Adjust your project duration to fit your animation by using the timeline controls:
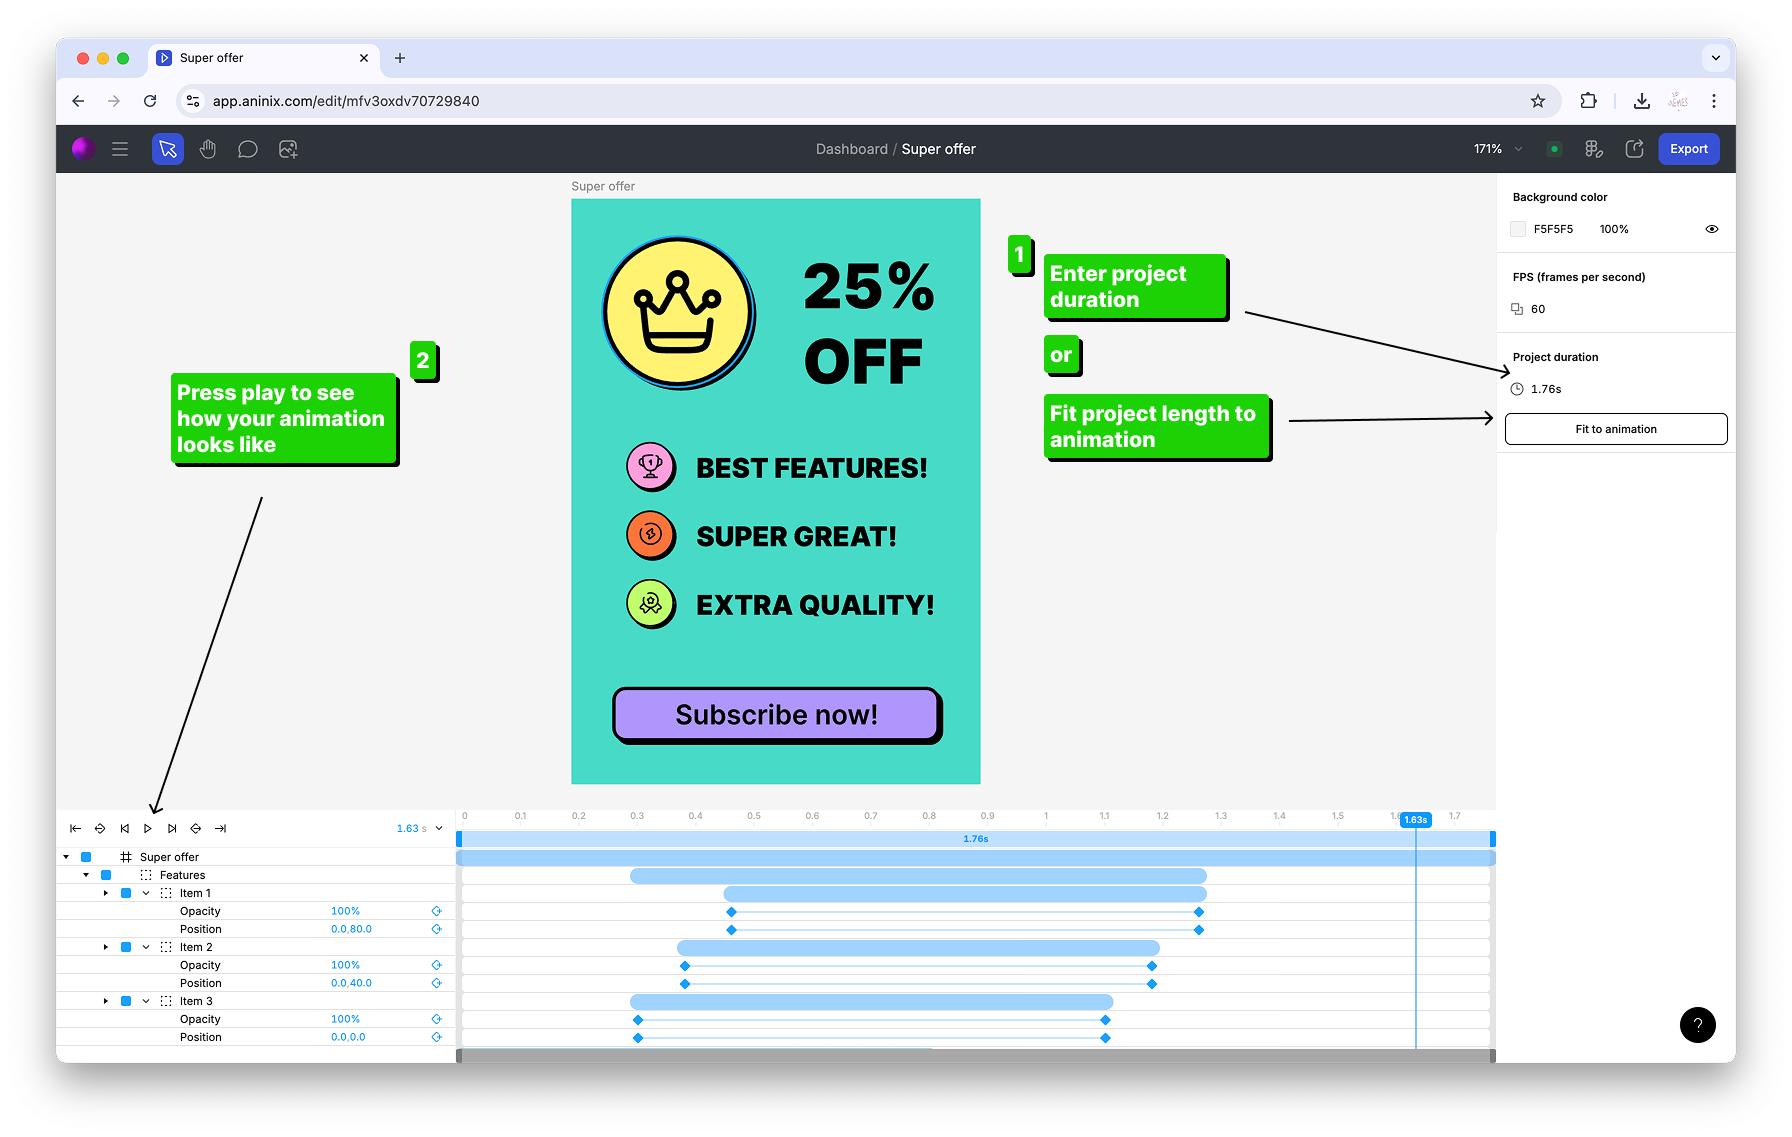
You can change the project duration to ensure your animation timing matches your desired length and all keyframes fit properly within the timeline.
## Tips for Using Quick Presets
- **Start Simple:** Begin with basic fade-in or slide-in effects before trying more complex animations
- **Layer Your Animations:** Apply different presets to different elements to create depth and visual interest
- **Preview Often:** Use the play button to preview your animations as you build them
- **Adjust Timing:** Use the timeline to fine-tune when each animation starts and ends
## What's Next?
Quick Presets are perfect for getting started, but sometimes you need more control over your animations. In the next guide, you'll learn how to [create custom keyframe animations](https://aninix.com/guides/create-keyframe-animation) that give you complete control over every aspect of your animation timing and movement.
Ready to export your animation? Skip ahead to learn how to [export your animation in different formats](https://aninix.com/guides/export-animation-formats).
Need to make changes to your Figma design? Learn how to [sync changes](https://aninix.com/guides/sync-changes) between your design and animation.
---
- **Next:** [Create Your First Keyframe Animation](https://aninix.com/guides/create-keyframe-animation)
© 2021-2026 Aninix Inc. All rights reserved
© 2021-2026 Aninix Inc. All rights reserved