Create Your First Keyframe Animation
Create Your First Keyframe Animation
# Create Your First Keyframe Animation
**Previous:** [Create Your First Animation with Quick Presets](https://aninix.com/guides/create-animation-with-presets) | **Next:** [Export Your Animation to Different Formats](https://aninix.com/guides/export-animation-formats)
Once you've mastered Quick Presets, it's time to unlock the full power of animation with custom keyframes. Keyframe animation gives you complete control over how your elements move, scale, rotate, and change over time.
## What are Keyframes?
Keyframes are specific points in time where you define the properties of your animated elements. Aninix automatically creates smooth transitions between these keyframes, giving you precise control over your animation timing and effects.
## Creating Position Animations
### Step 1: Create Your First Keyframe
Start by creating your first position keyframe at the current time:
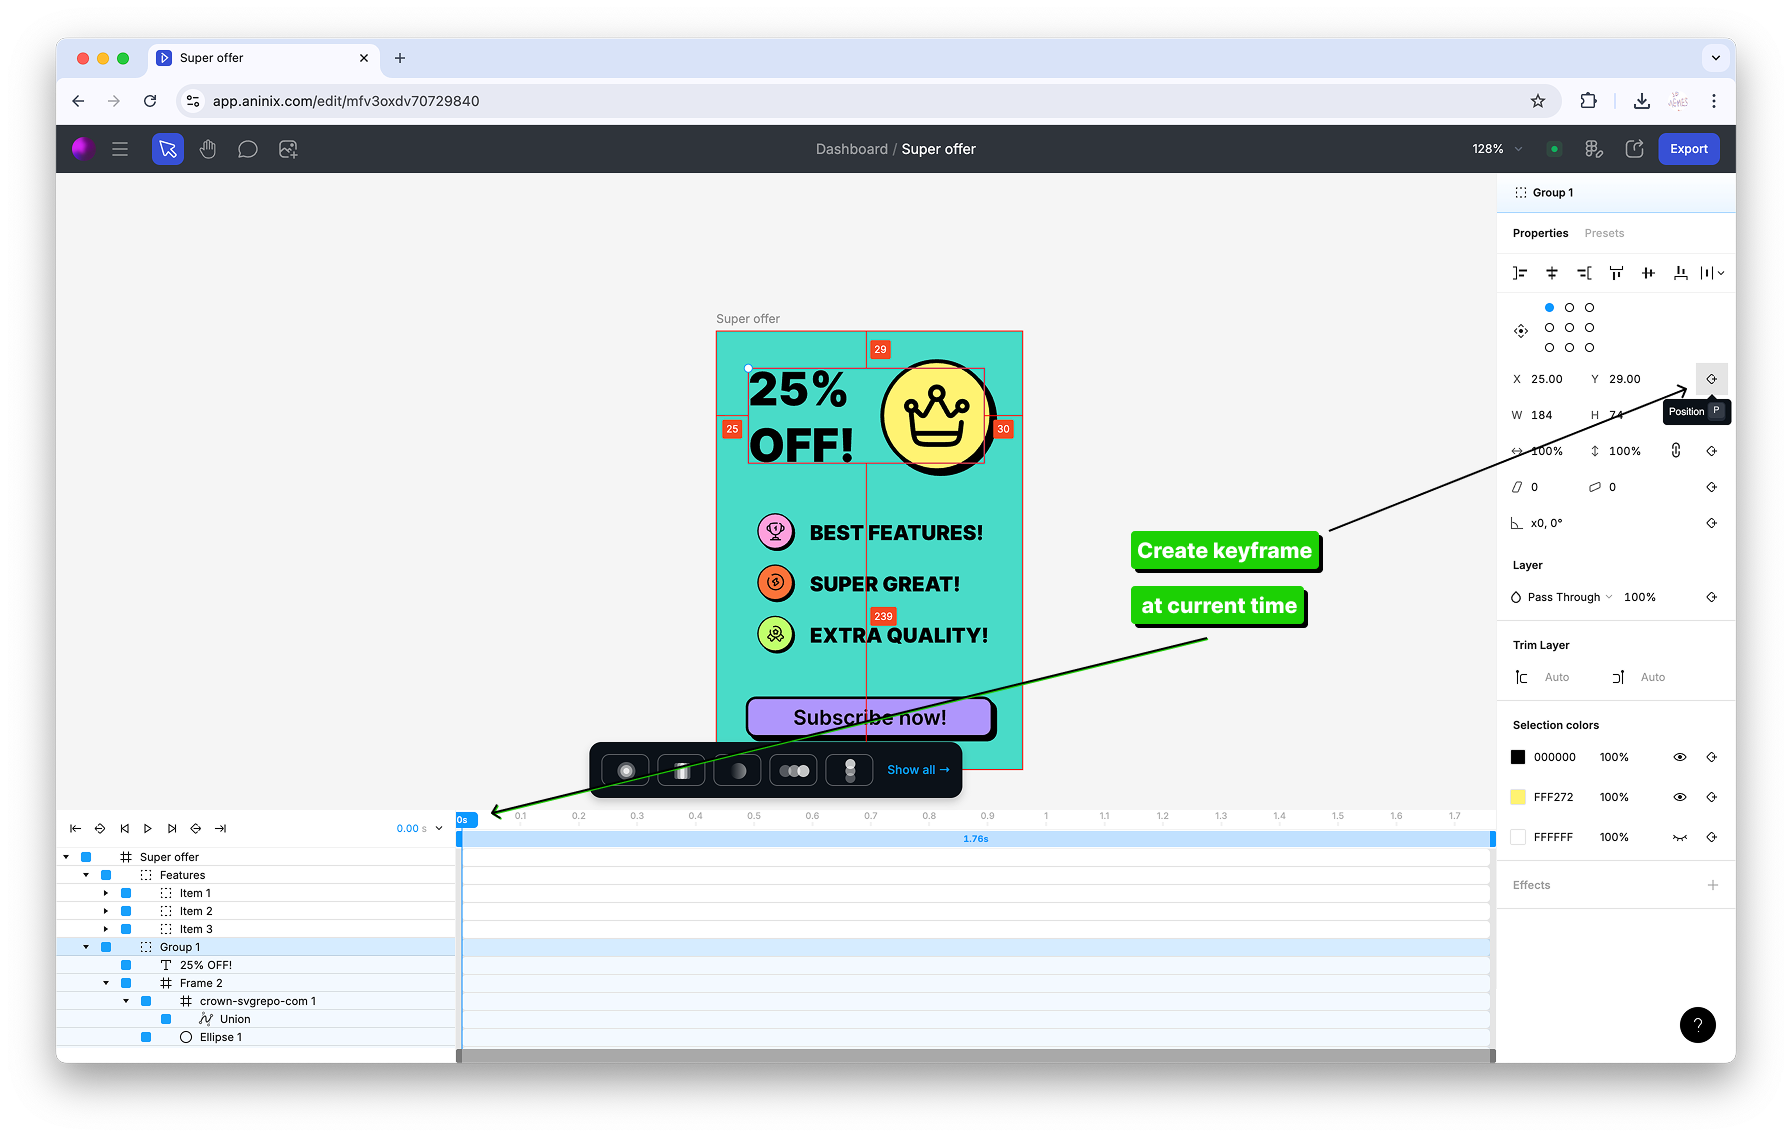
This establishes the starting position for your element's animation.
### Step 2: Create a Second Keyframe
Create a second keyframe for the header position at a different point in time:
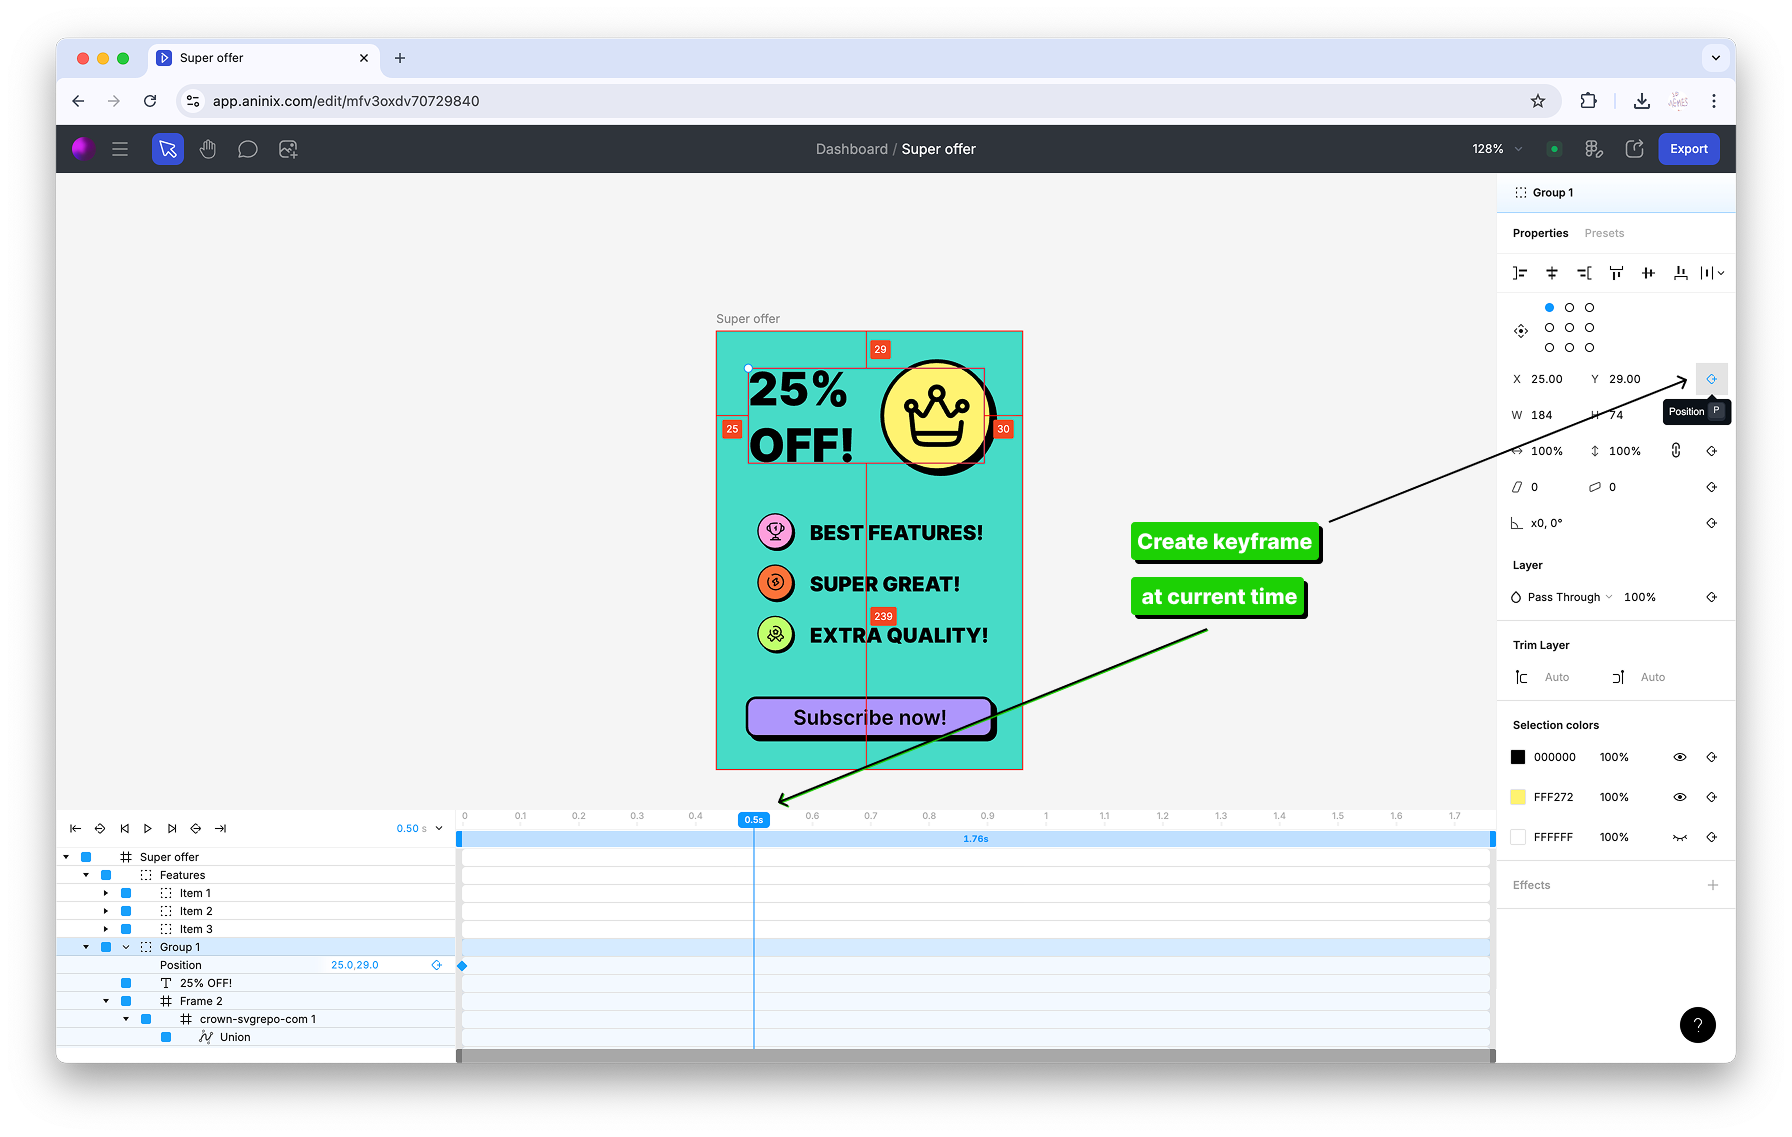
This defines where your element will be at the end of the animation.
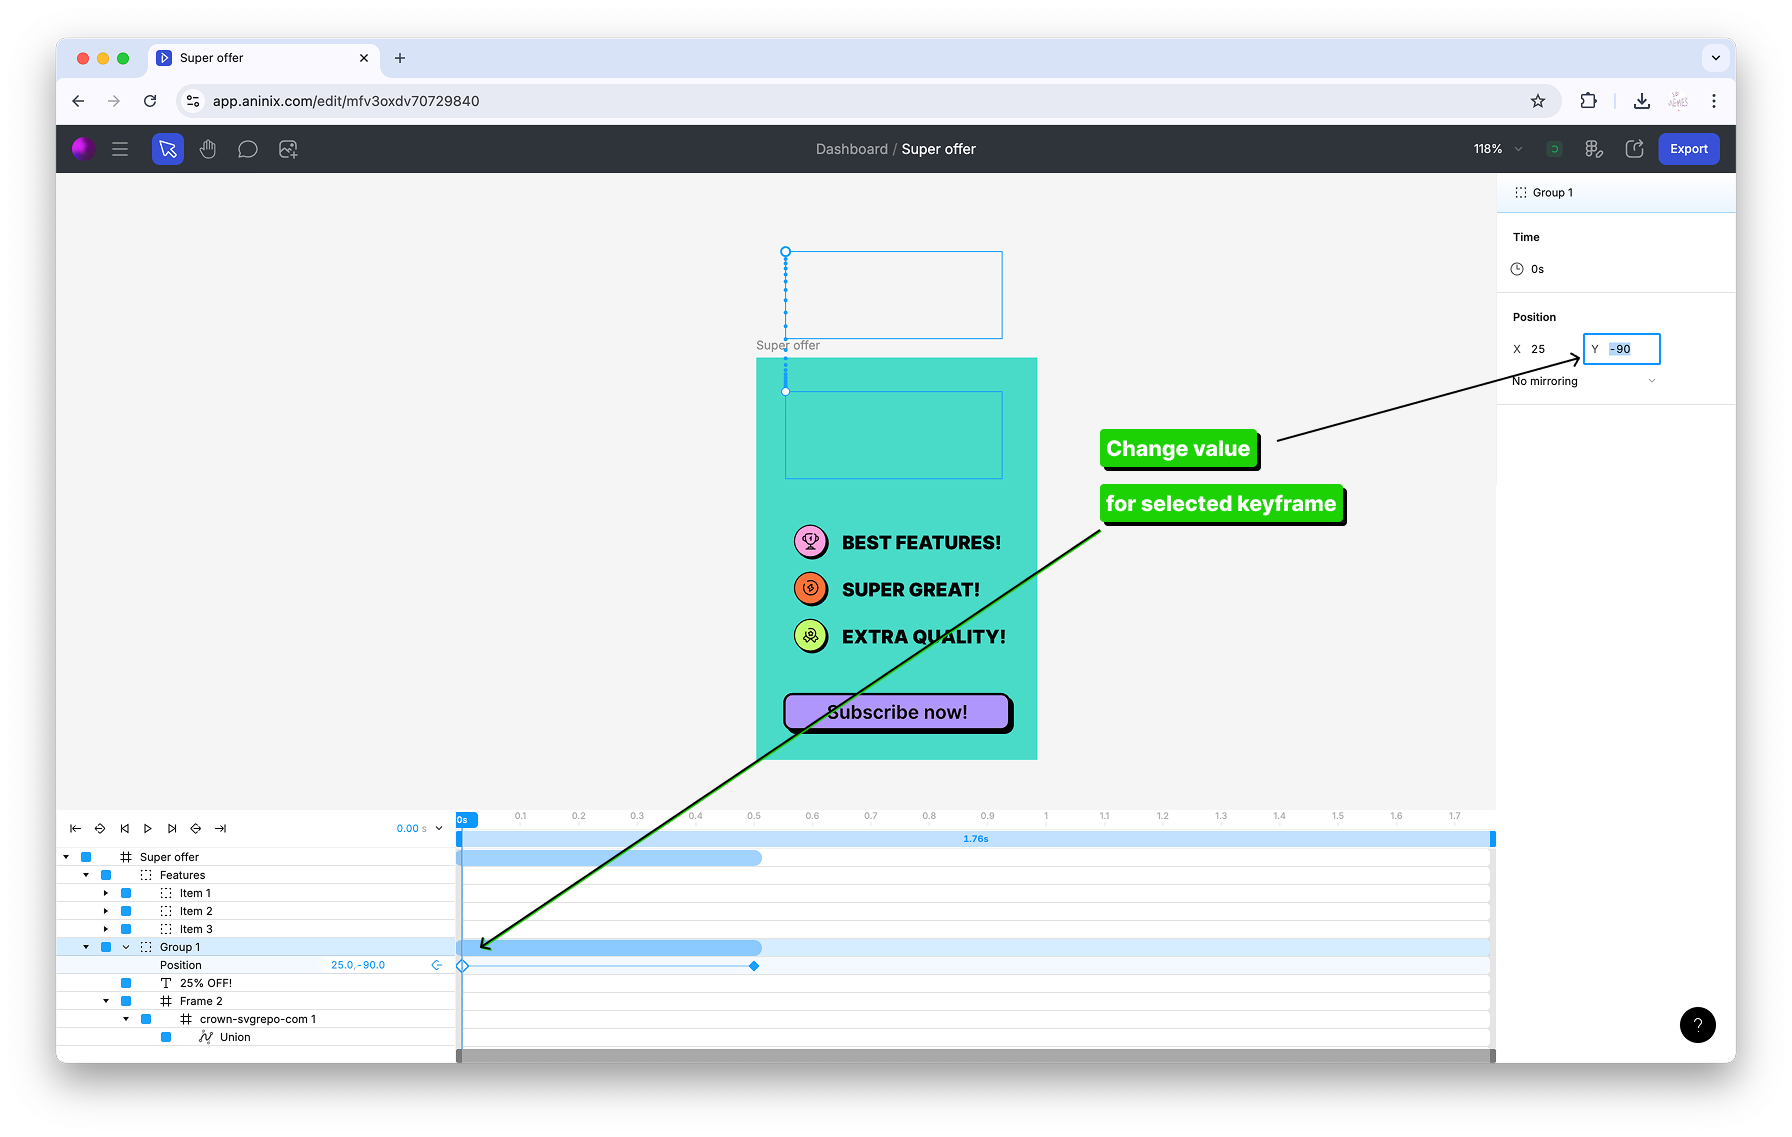
### Step 3: Adjust Keyframe Values
Change the value for your first header position keyframe to create the desired movement:
### Step 4: Preview Your Animation
See your position animation in action:

## Animating Multiple Elements
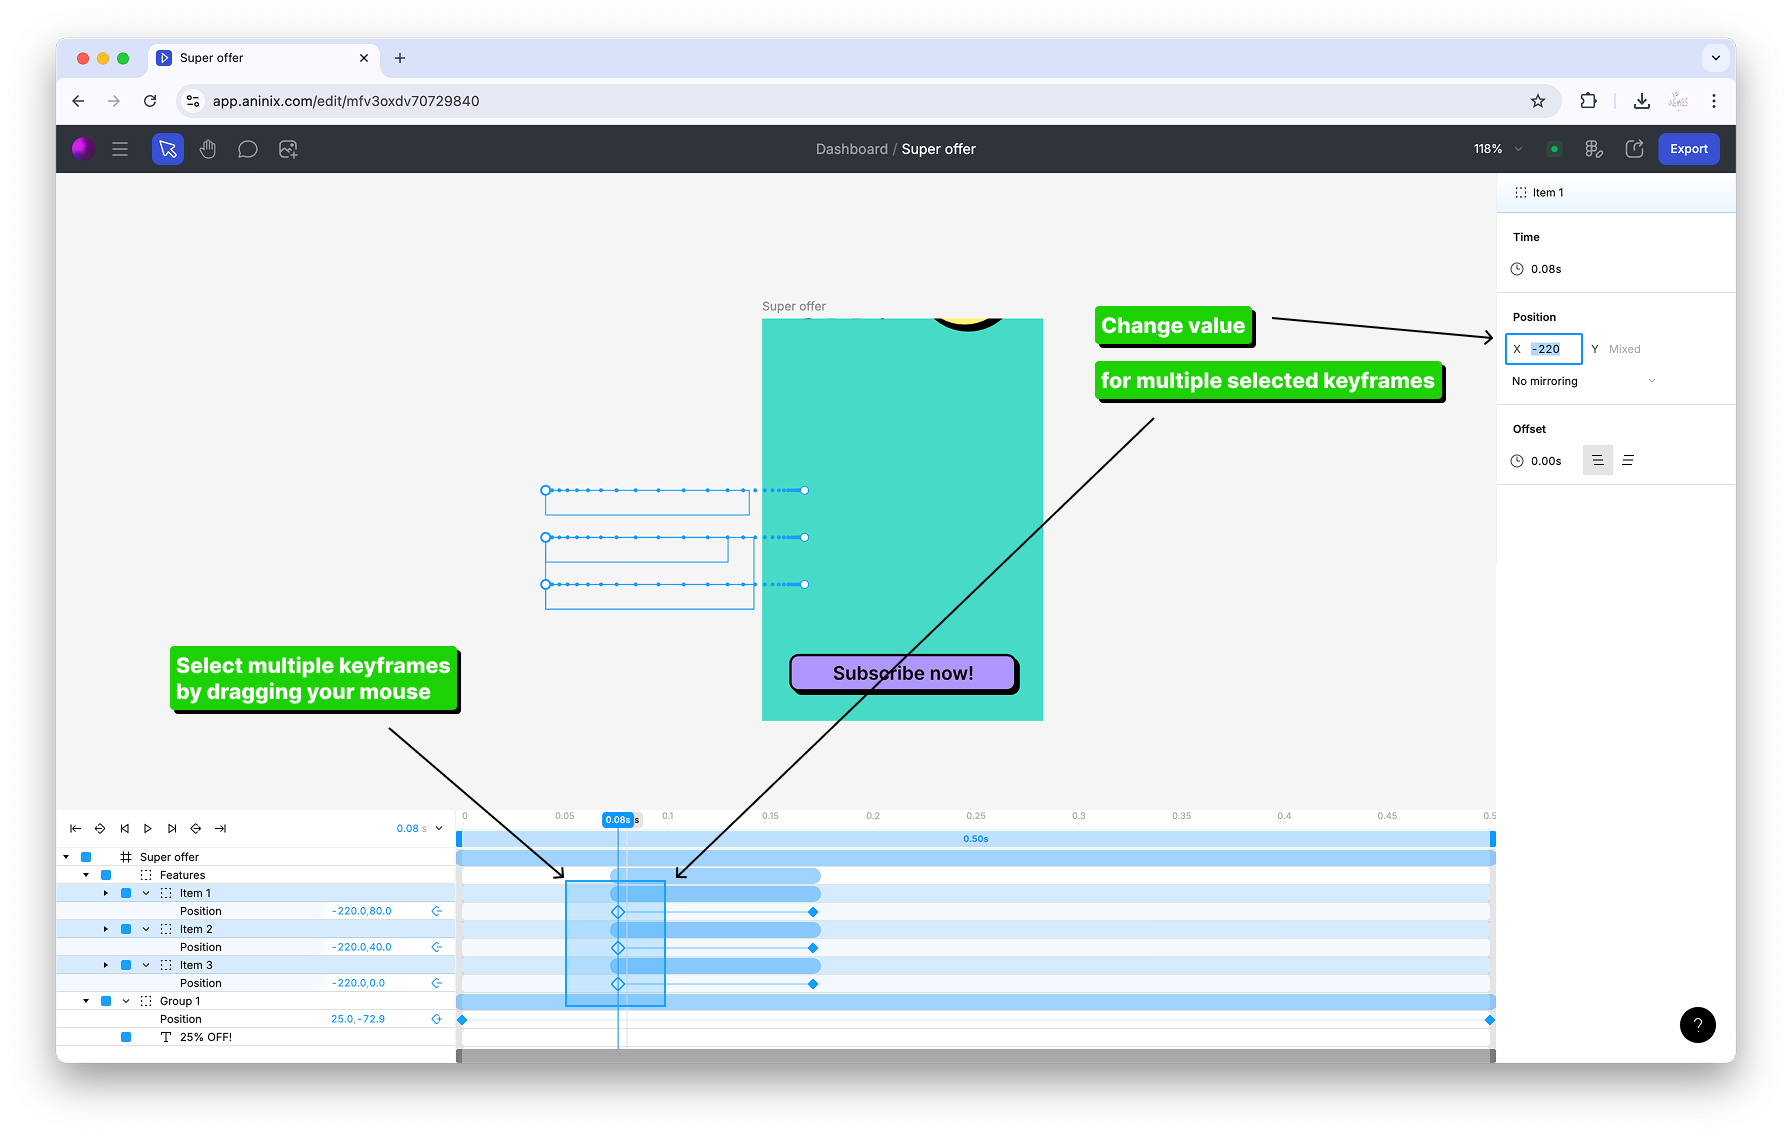
### Batch Keyframe Editing
You can change keyframe values for multiple selected items at once:
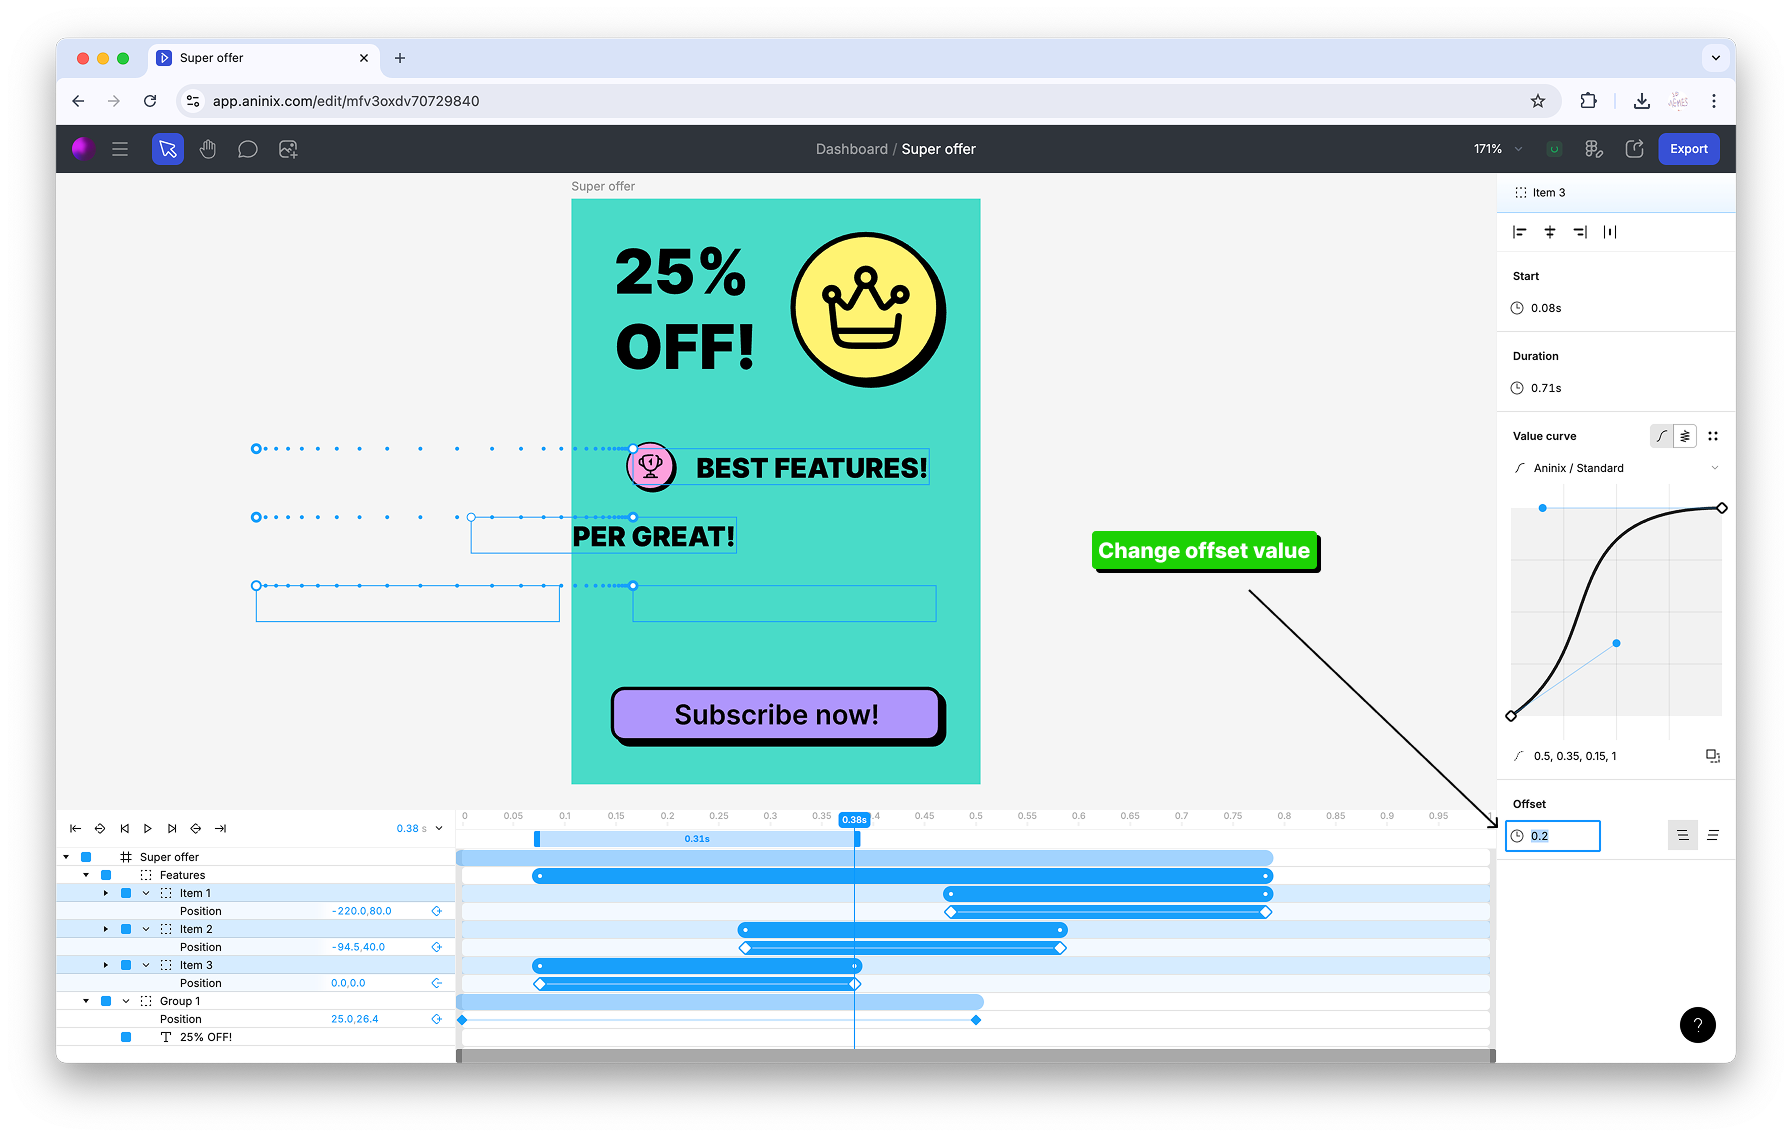
### Animation Timing Control
Adjust the offset value for multiple animation segments to create staggered effects:
## Creating Scale Animations
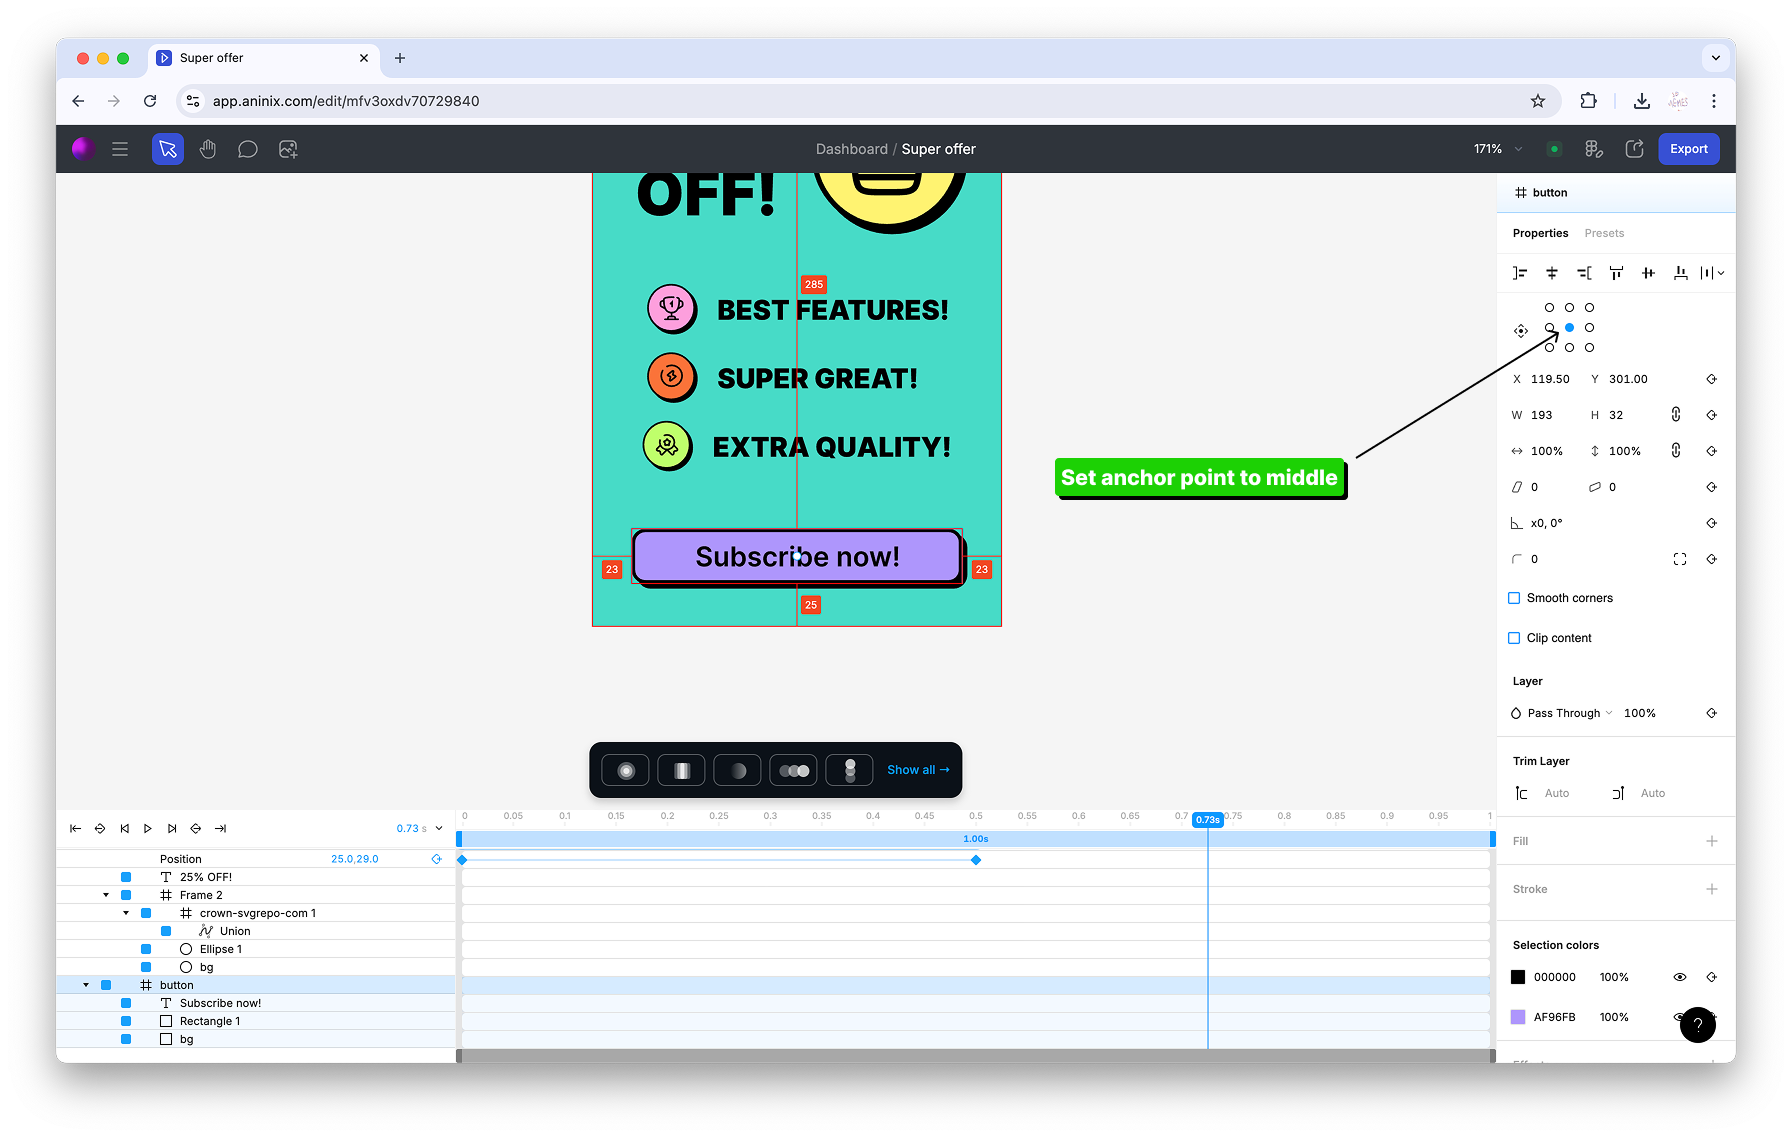
### Step 1: Set the Anchor Point
For better control over scaling animations, set the anchor point to middle:
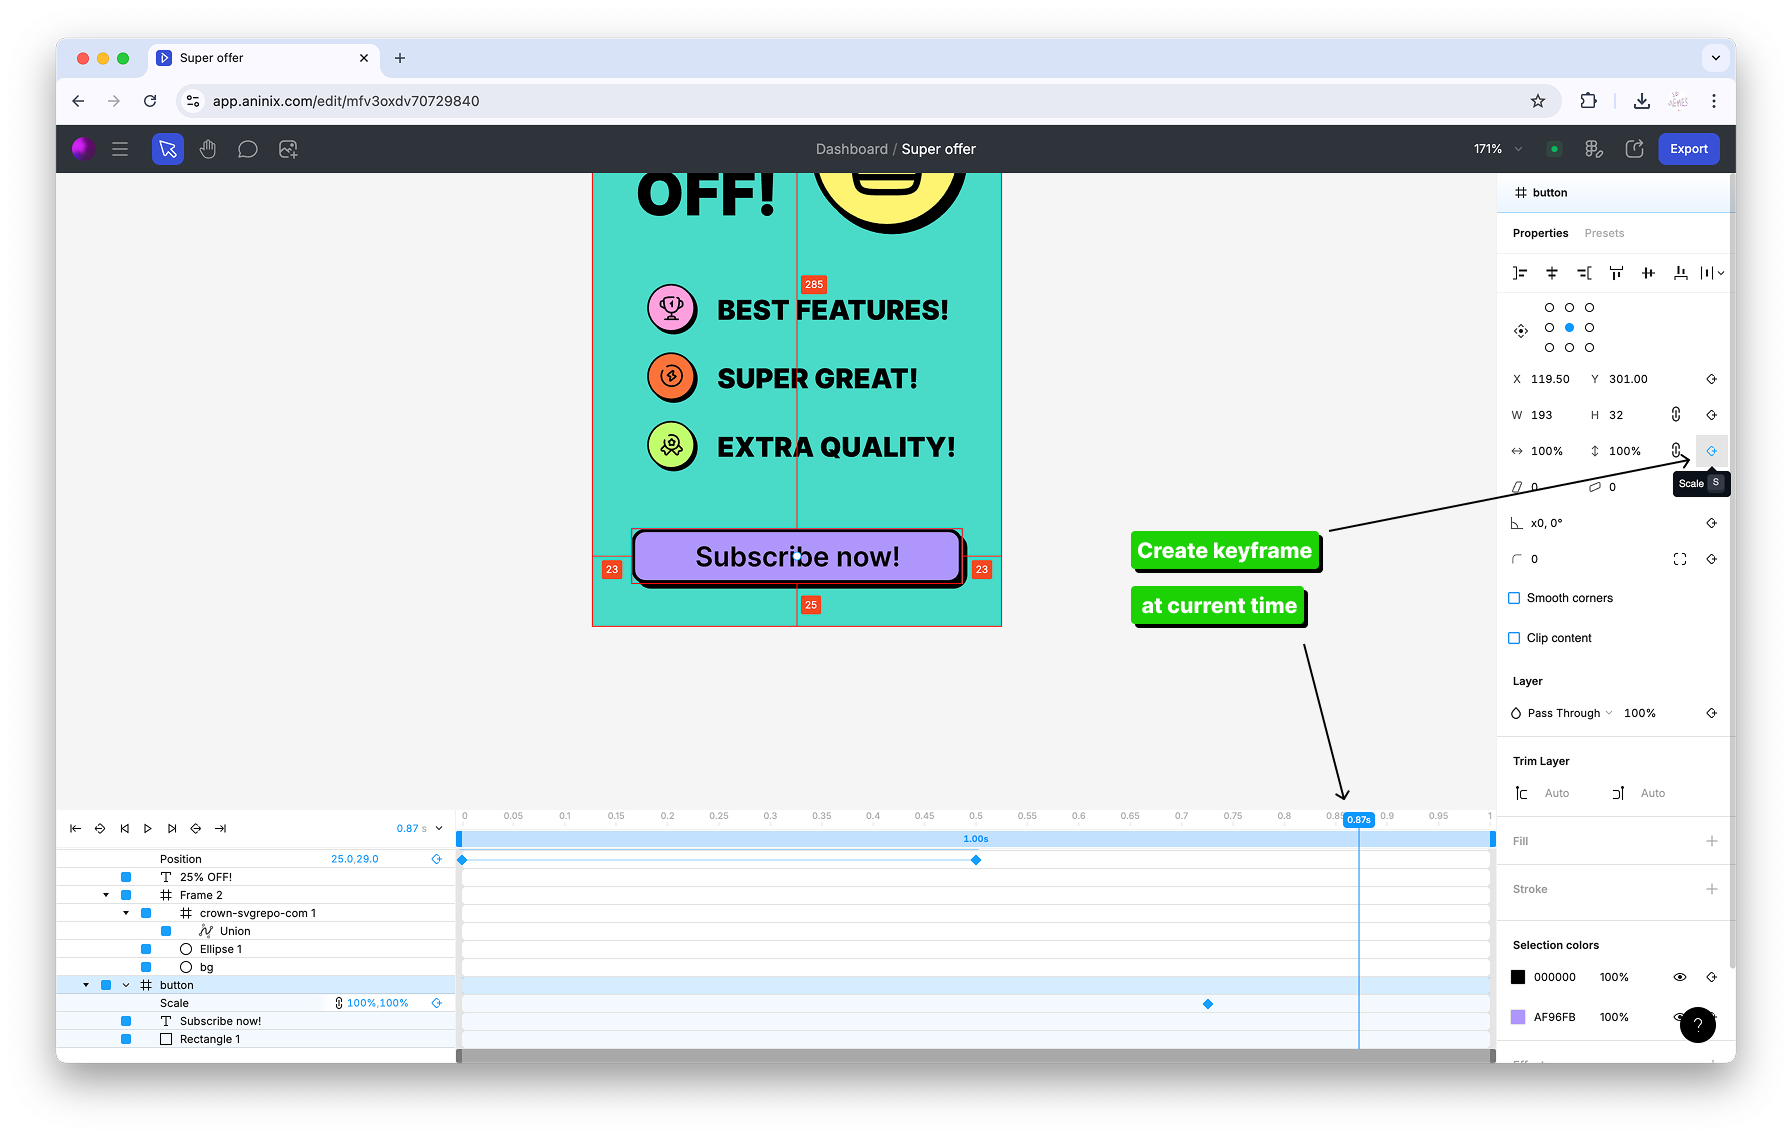
### Step 2: Create Scale Keyframes
Create scale keyframes for button size animations:
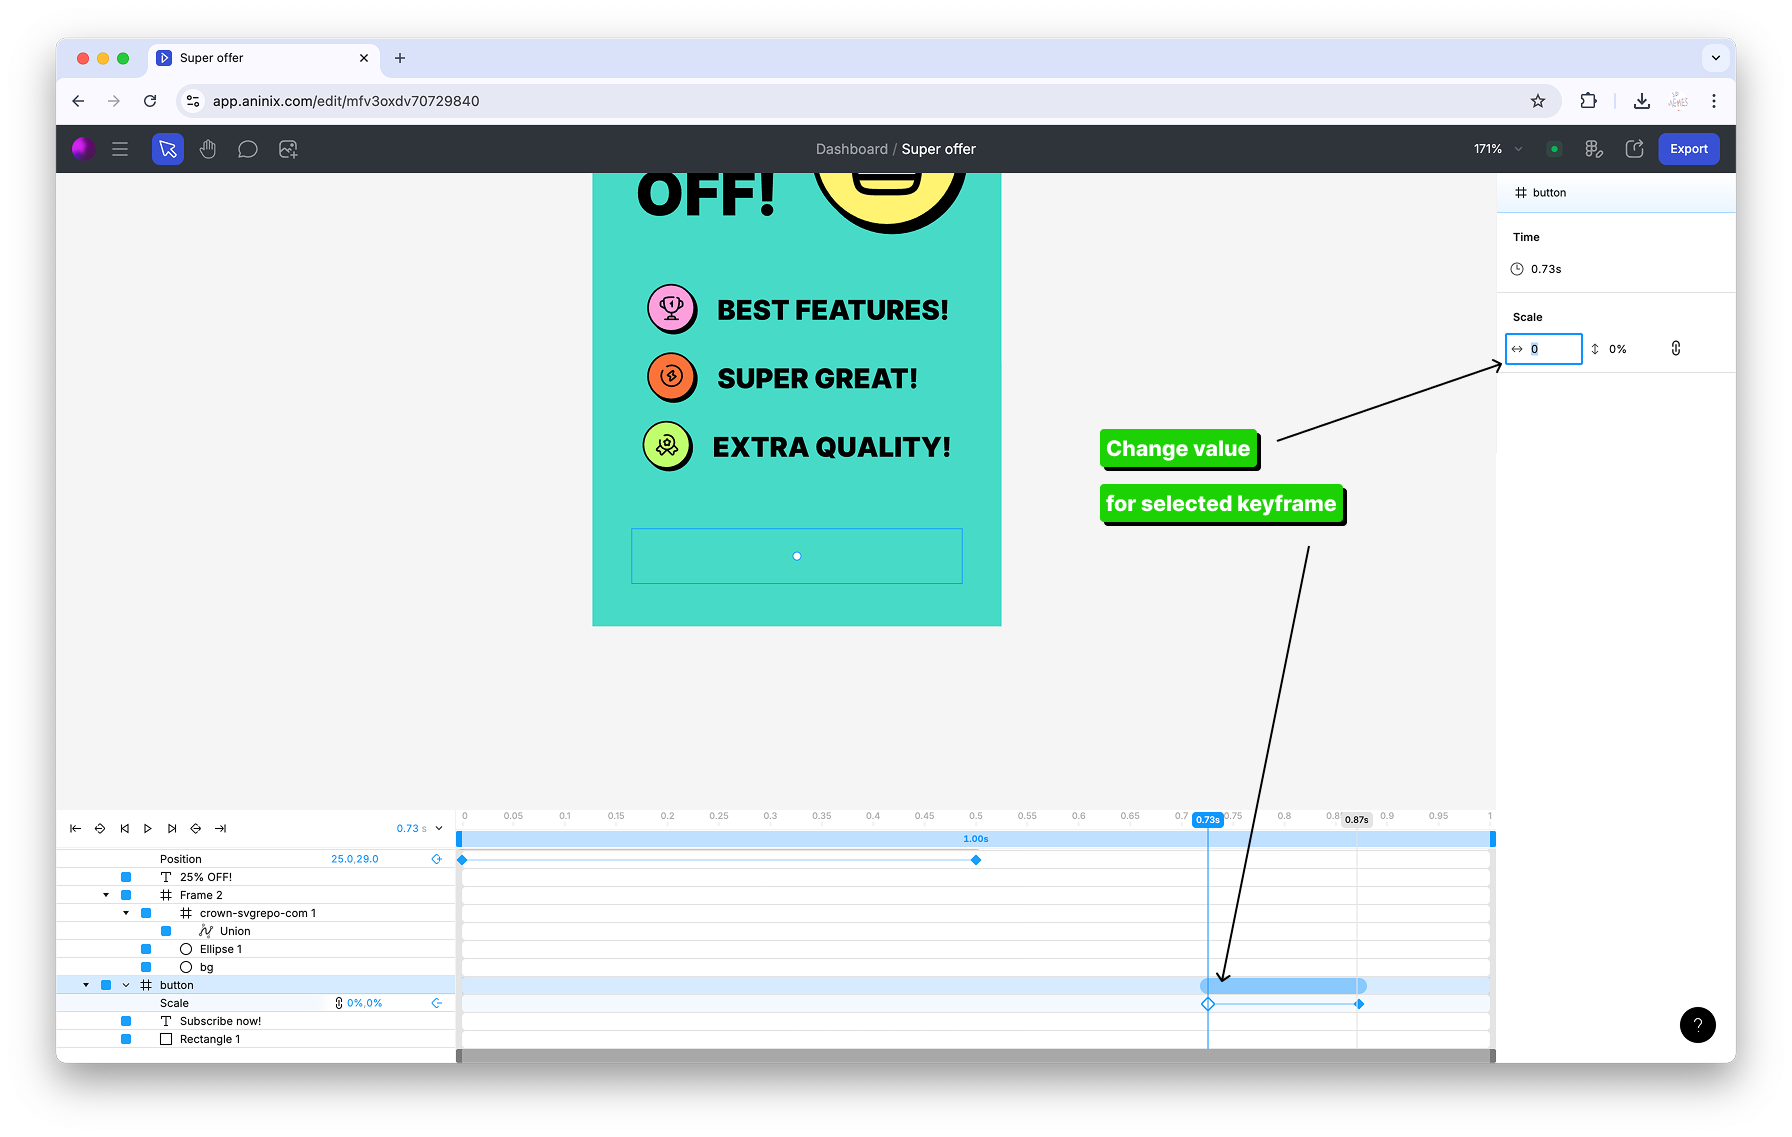
### Step 3: Modify Keyframe Values
Modify the first keyframe value for the button animation to create the scaling effect:
### Step 4: View Your Completed Animation
View your completed keyframe animation:

## Keyframe Animation Tips
- **Plan Your Movement:** Think about the path your element should take before creating keyframes
- **Use Anchor Points:** Set appropriate anchor points for scaling and rotation animations
- **Timing is Key:** Experiment with keyframe timing to create different animation feels
- **Preview Often:** Use the timeline scrubber to preview your animations as you build them
- **Layer Effects:** Combine position, scale, and rotation keyframes for complex animations
## Advanced Techniques
- **Easing:** Aninix automatically applies smooth easing between keyframes
- **Multiple Properties:** Animate position, scale, rotation, and opacity simultaneously
- **Staggered Animations:** Use offset values to create wave-like effects across multiple elements
## What's Next?
Now that you've created your custom animation, it's time to share it with the world! Learn how to [export your animation in different formats](https://aninix.com/guides/export-animation-formats) including GIF, Lottie, and video files.
You can also learn how to [preview your Lottie files](https://aninix.com/guides/preview-lottie-animation) before using them in your projects.
Ready to collaborate with developers? Learn how to [share animation with developer](https://aninix.com/guides/share-animation-with-developer) to generate ready-to-use CSS code and specifications.
---
- **Next:** [Export Your Animation to Different Formats](https://aninix.com/guides/export-animation-formats)
© 2021-2026 Aninix Inc. All rights reserved
© 2021-2026 Aninix Inc. All rights reserved