How to Create Ad Creatives from Figma Design
How to Create Ad Creatives from Figma Design
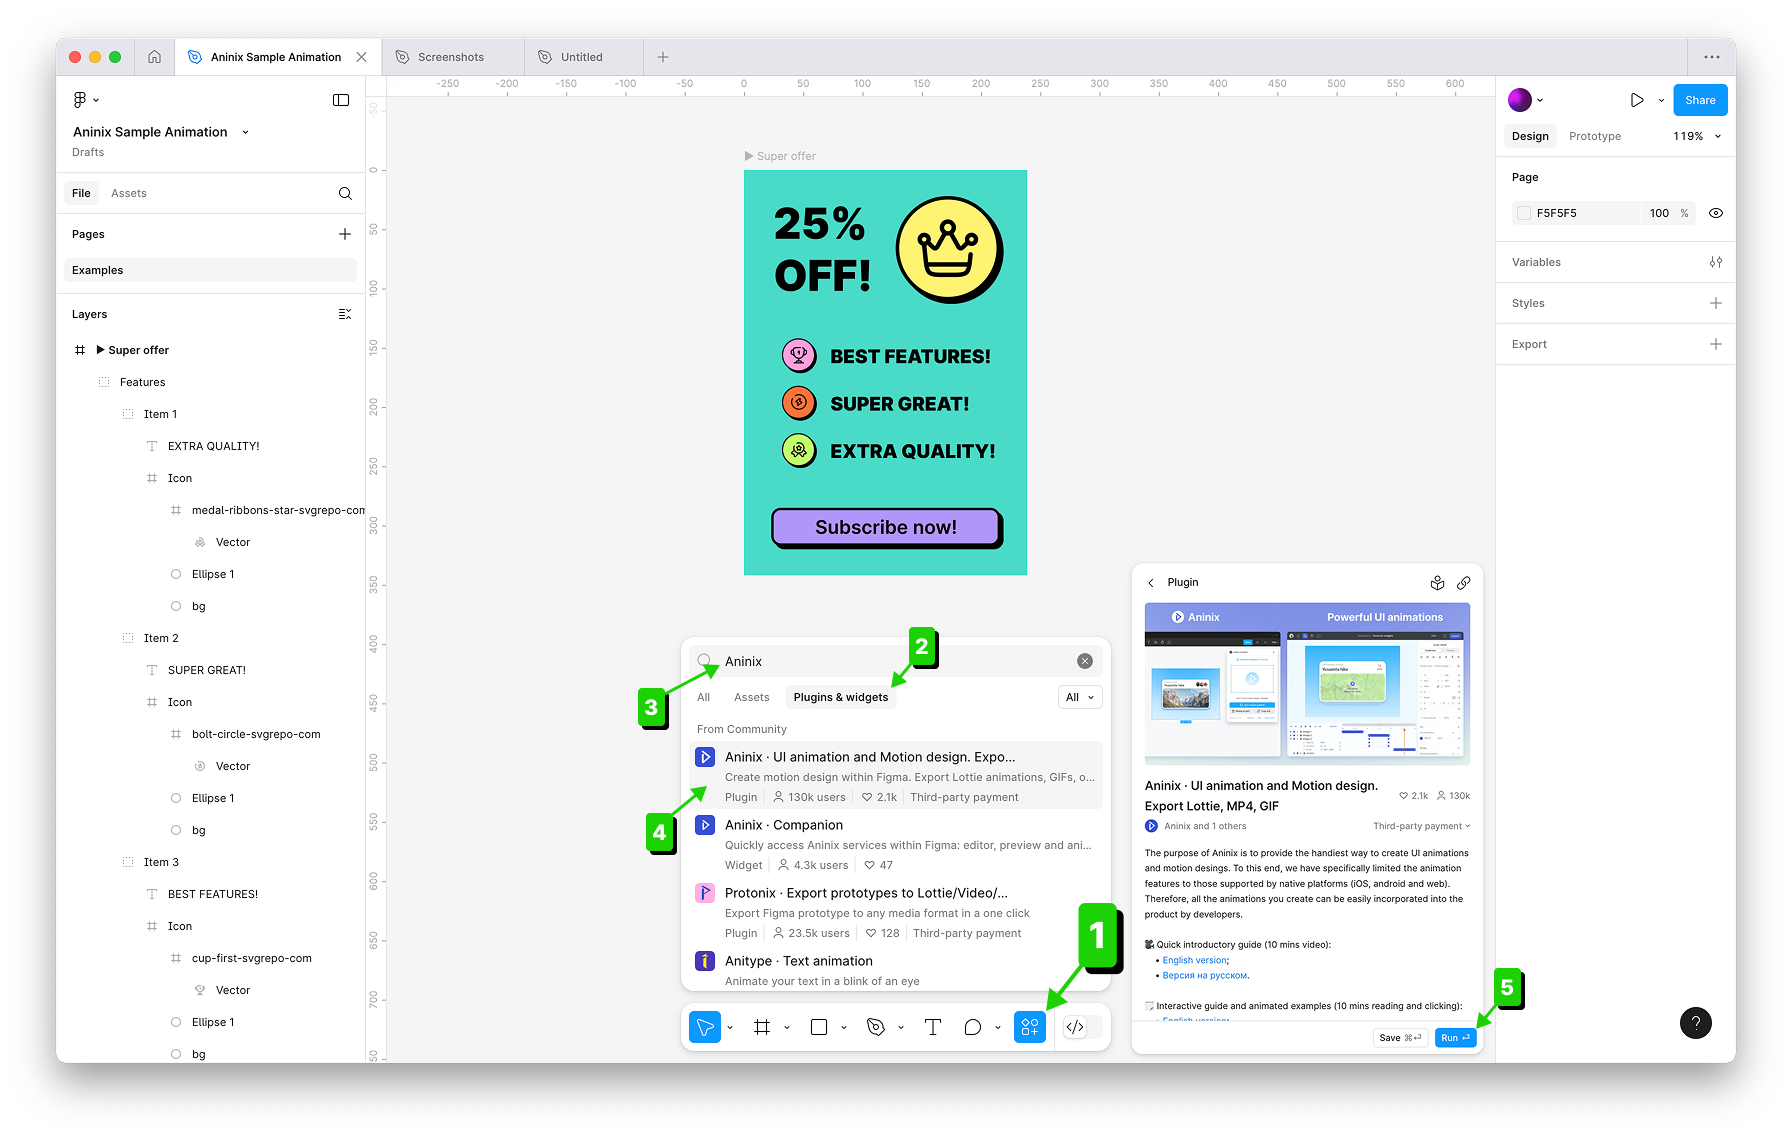
## Step 1: Install Plugin and Select Frame
1. Press `Actions` button in bottom Toolbar section
2. Choose `Plugins & widgets` section
3. Type `Aninix` in search bar
4. Click `Aninix • UI animation` plugin
5. Click `Run` button
2. When you first open the plugin menu, you'll see Aninix initial screen
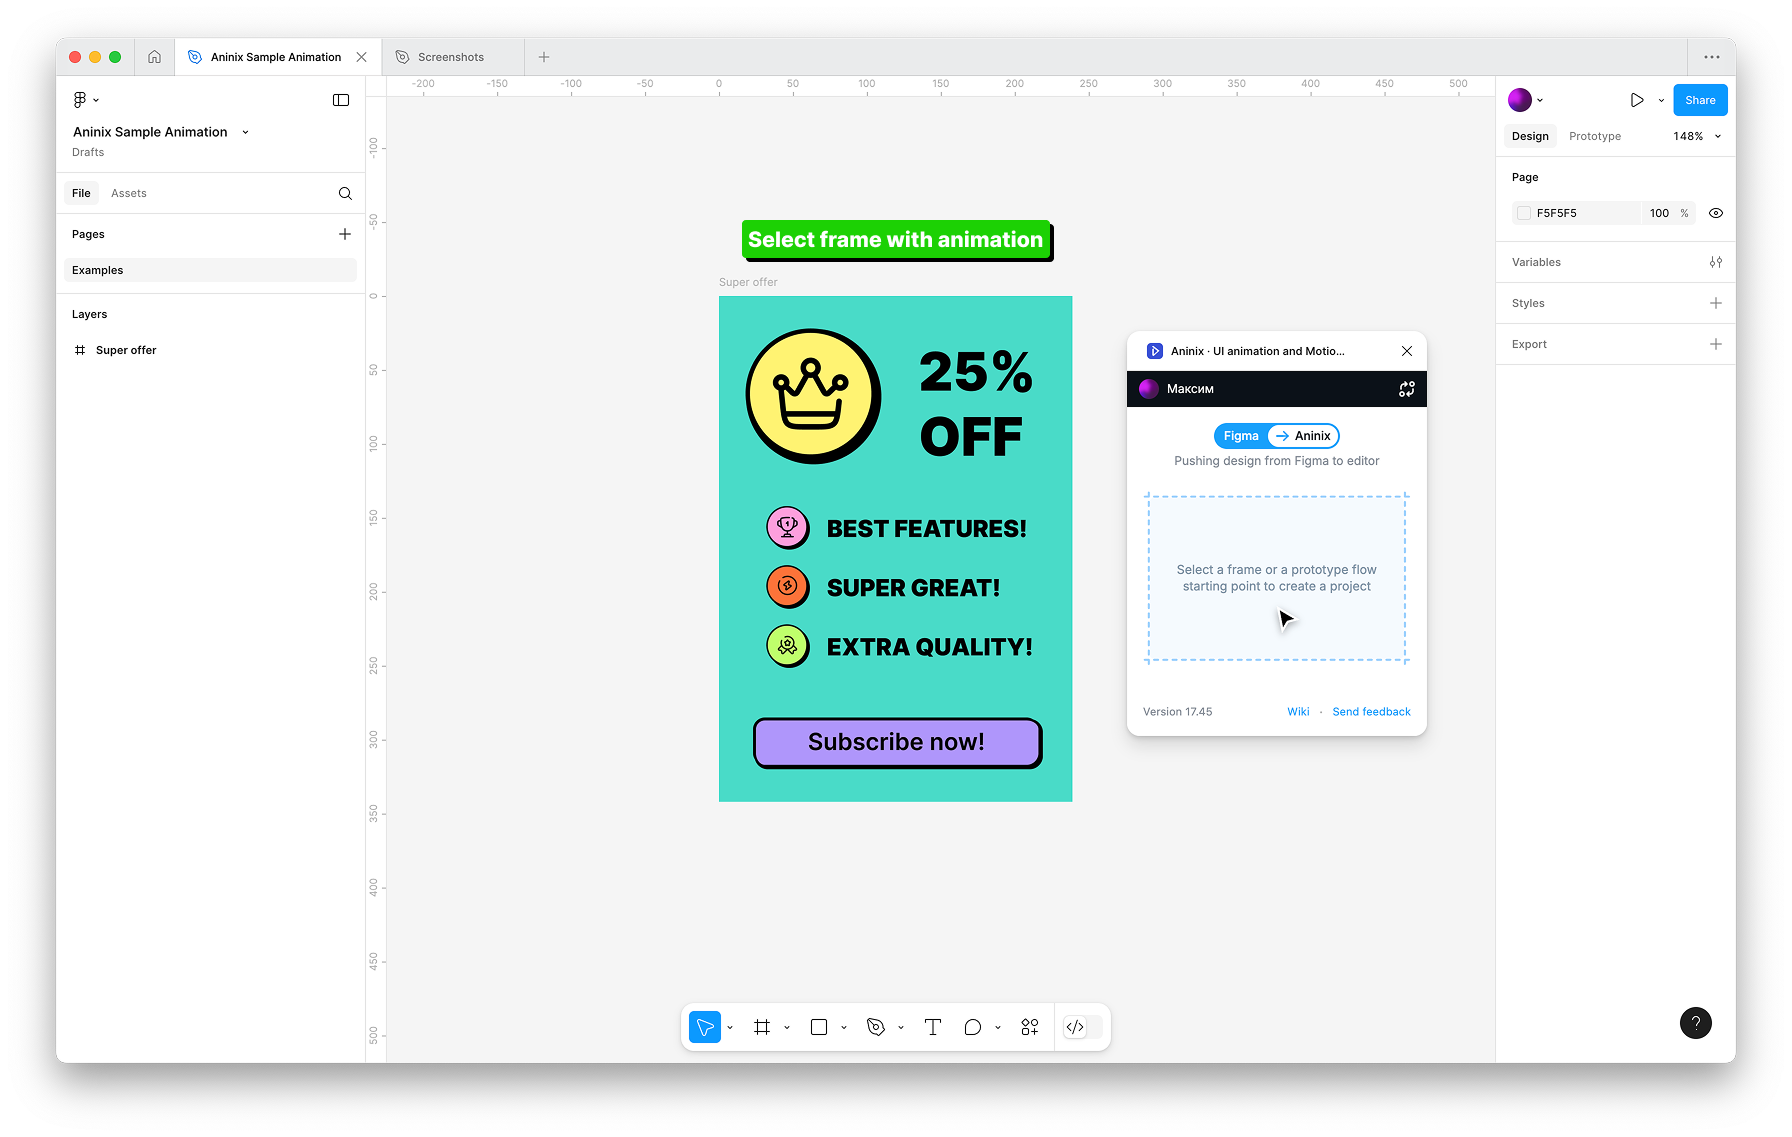
3. Select any frame in your Figma design that you want to animate
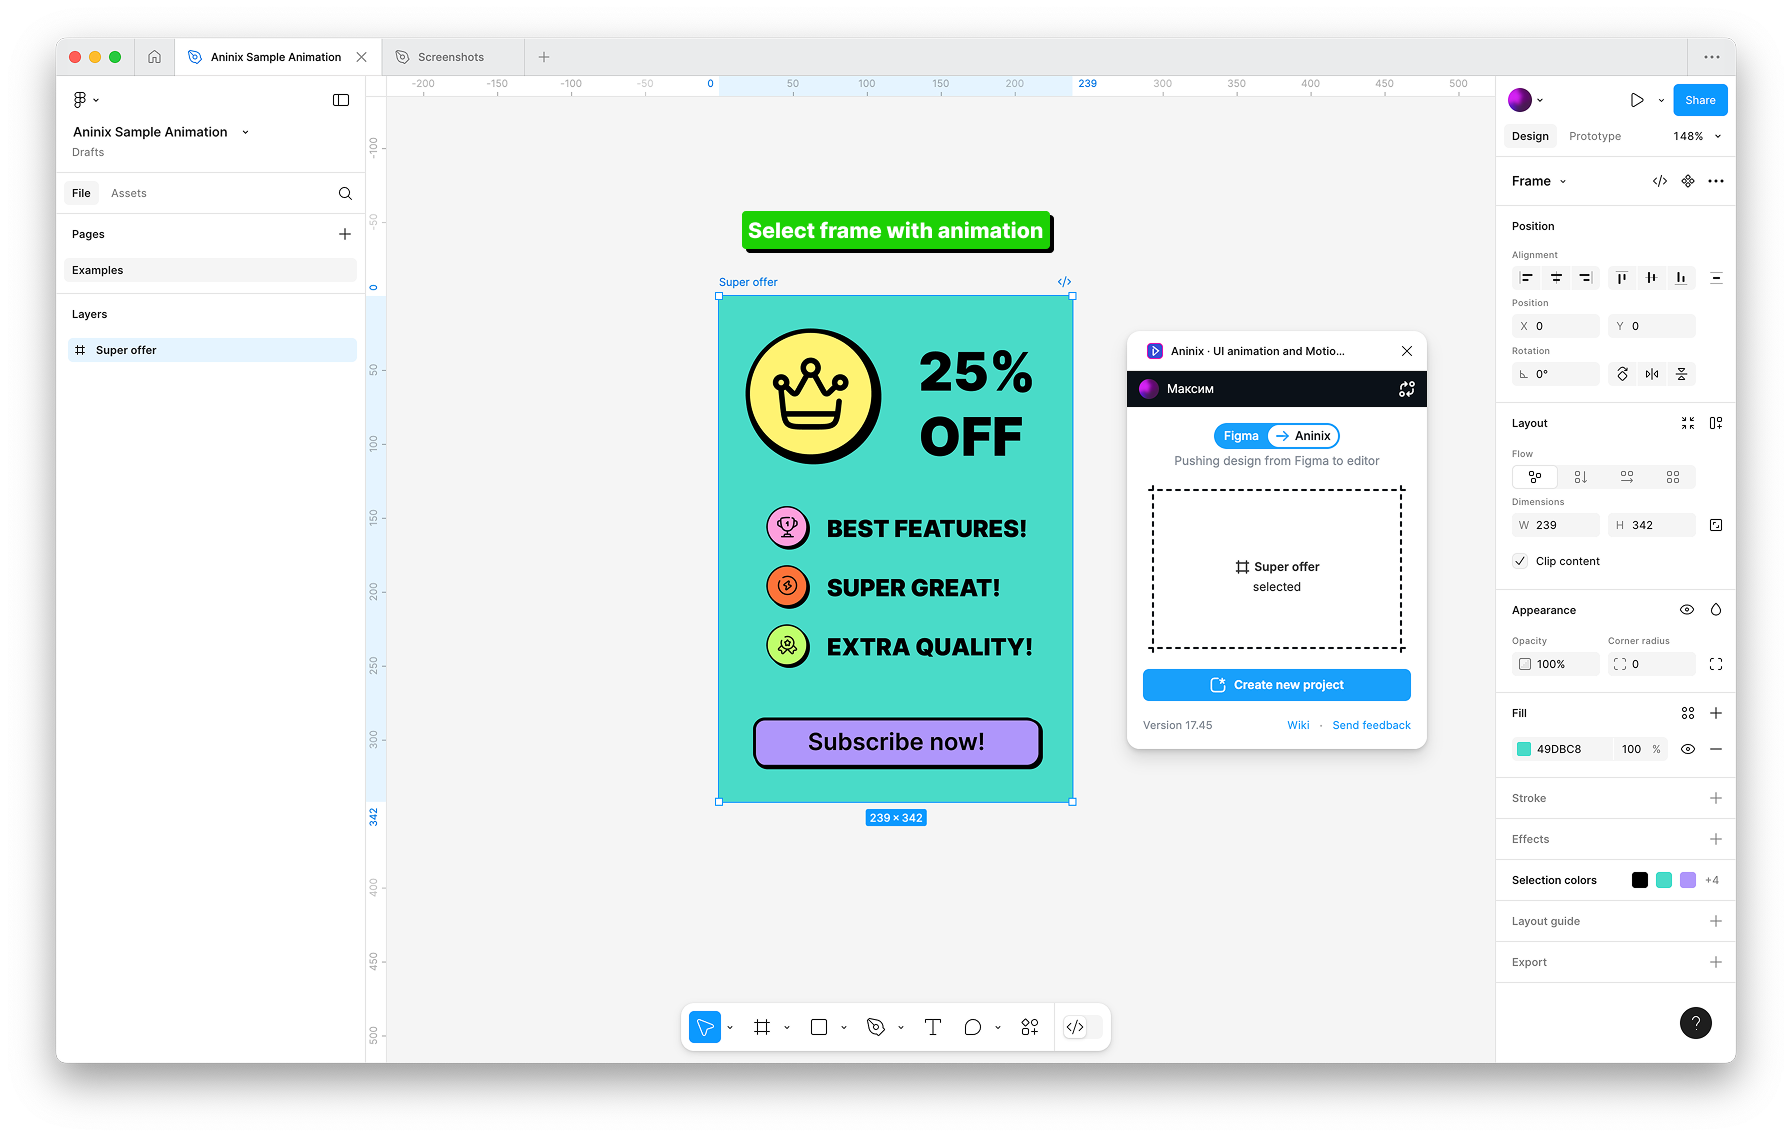
4. Aninix will automatically detect what you've selected and your design will appear in the workspace
5. Click `Create new project`
## Step 2: Make Animation with Presets
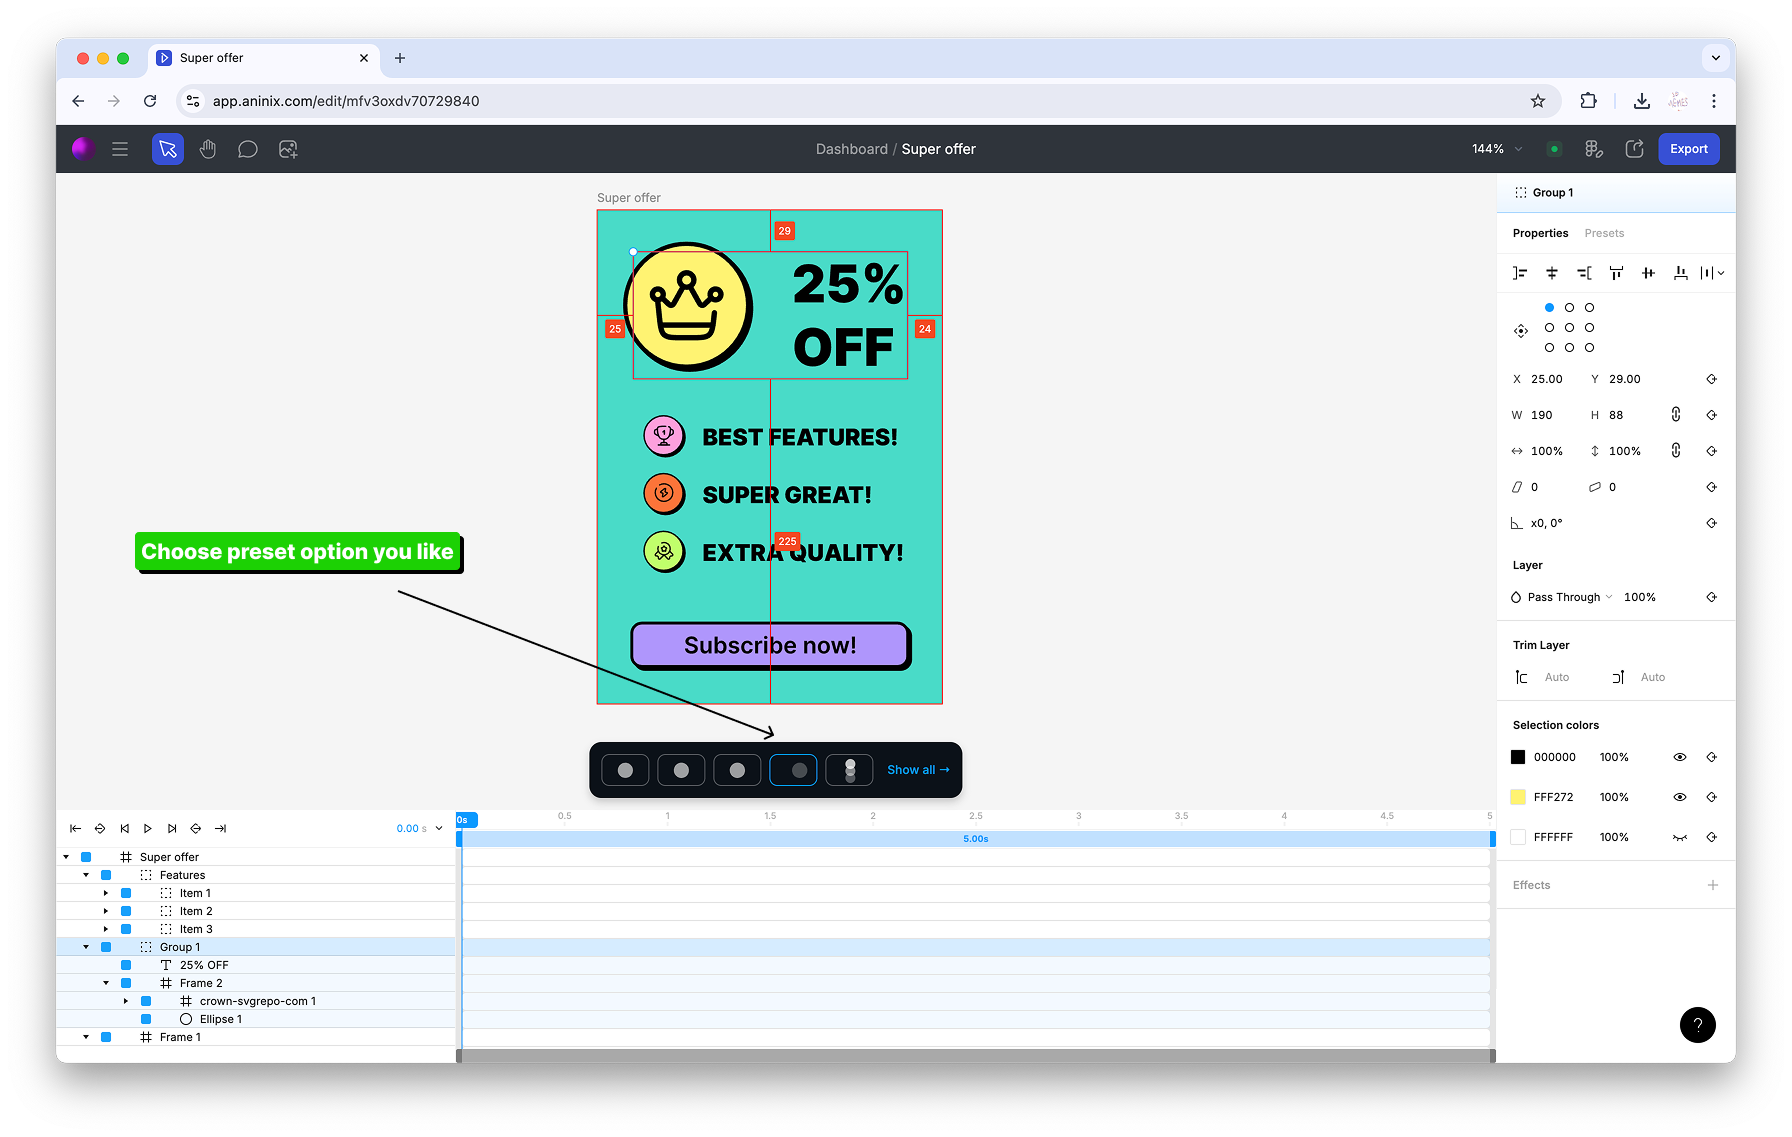
1. Once you've created your project, you'll see the editor workspace with your selected design elements
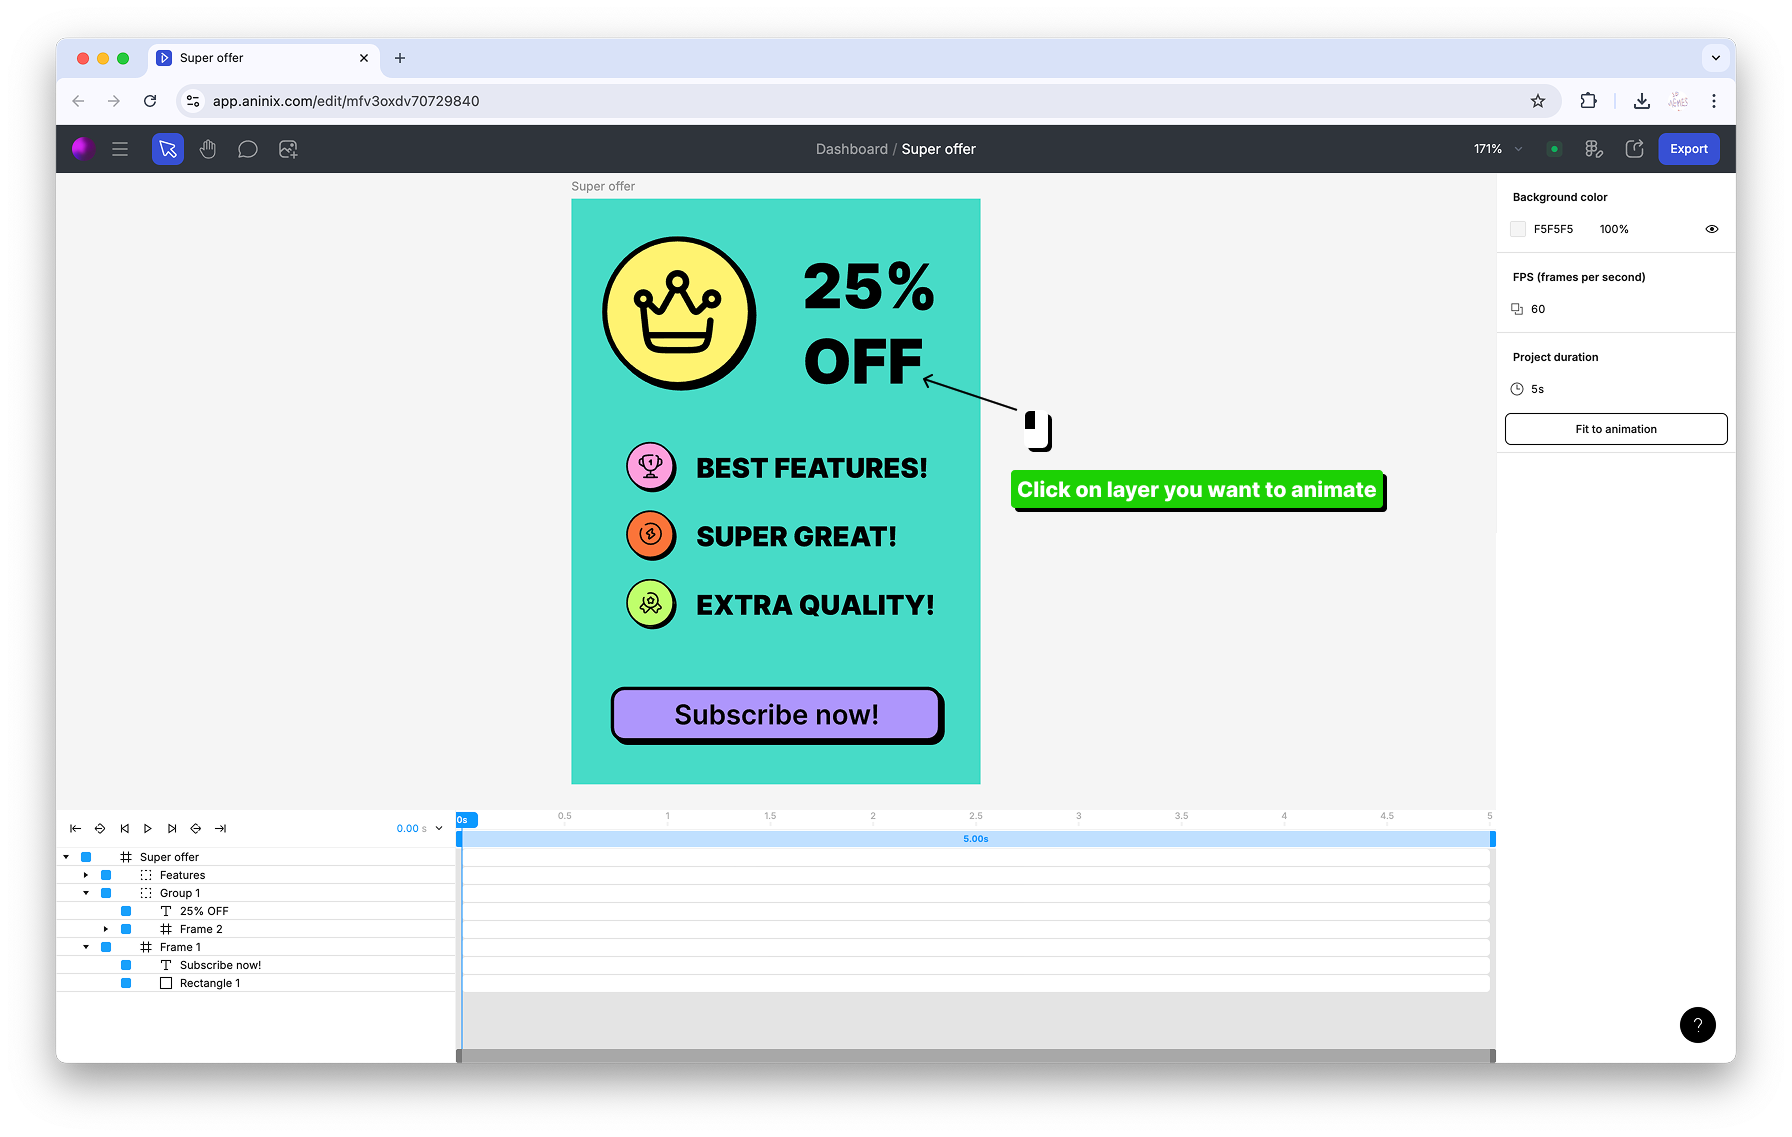
Click on any element in the canvas that you want to animate to select it.
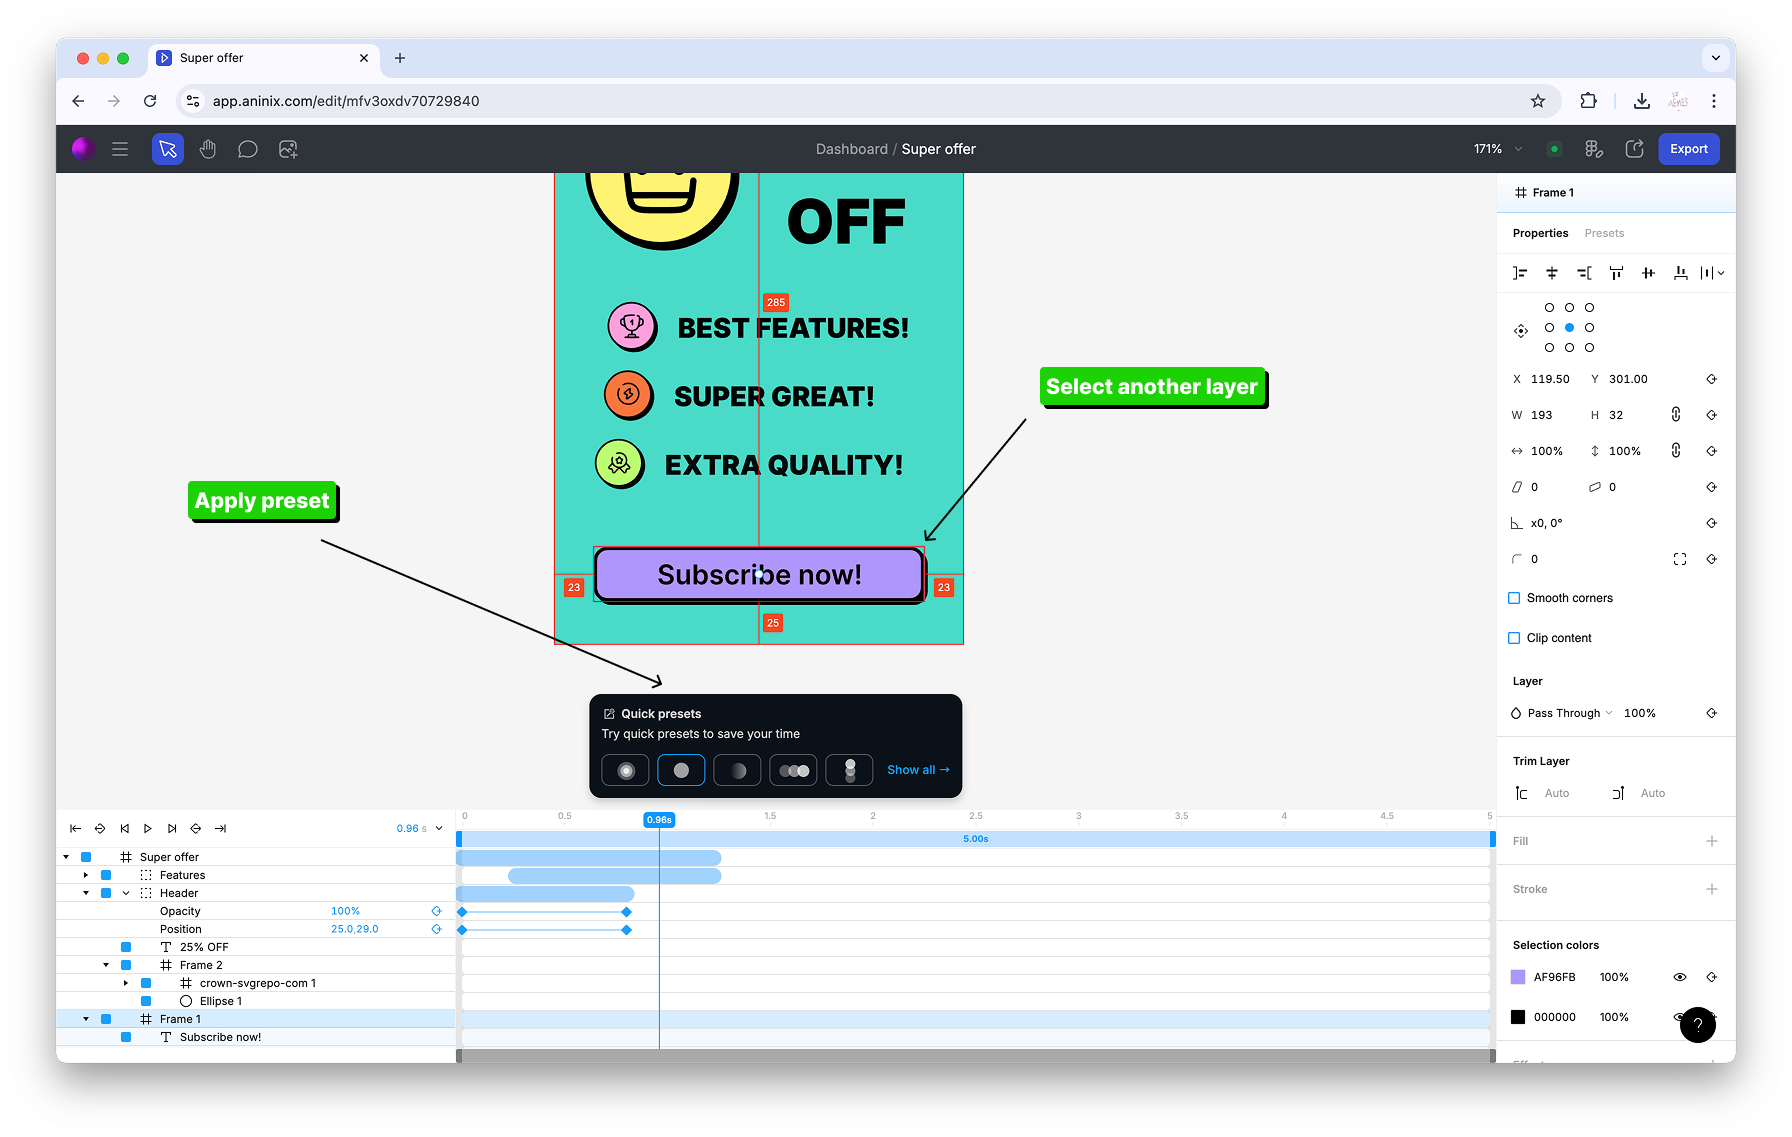
2. With an element selected, you'll see the Quick Presets popup appear at the top of the interface
Click on any preset from the Quick Presets popup to apply that animation to your selected element.
3. To animate multiple elements at once, hold `⇧ Shift` and click on additional layers in your design
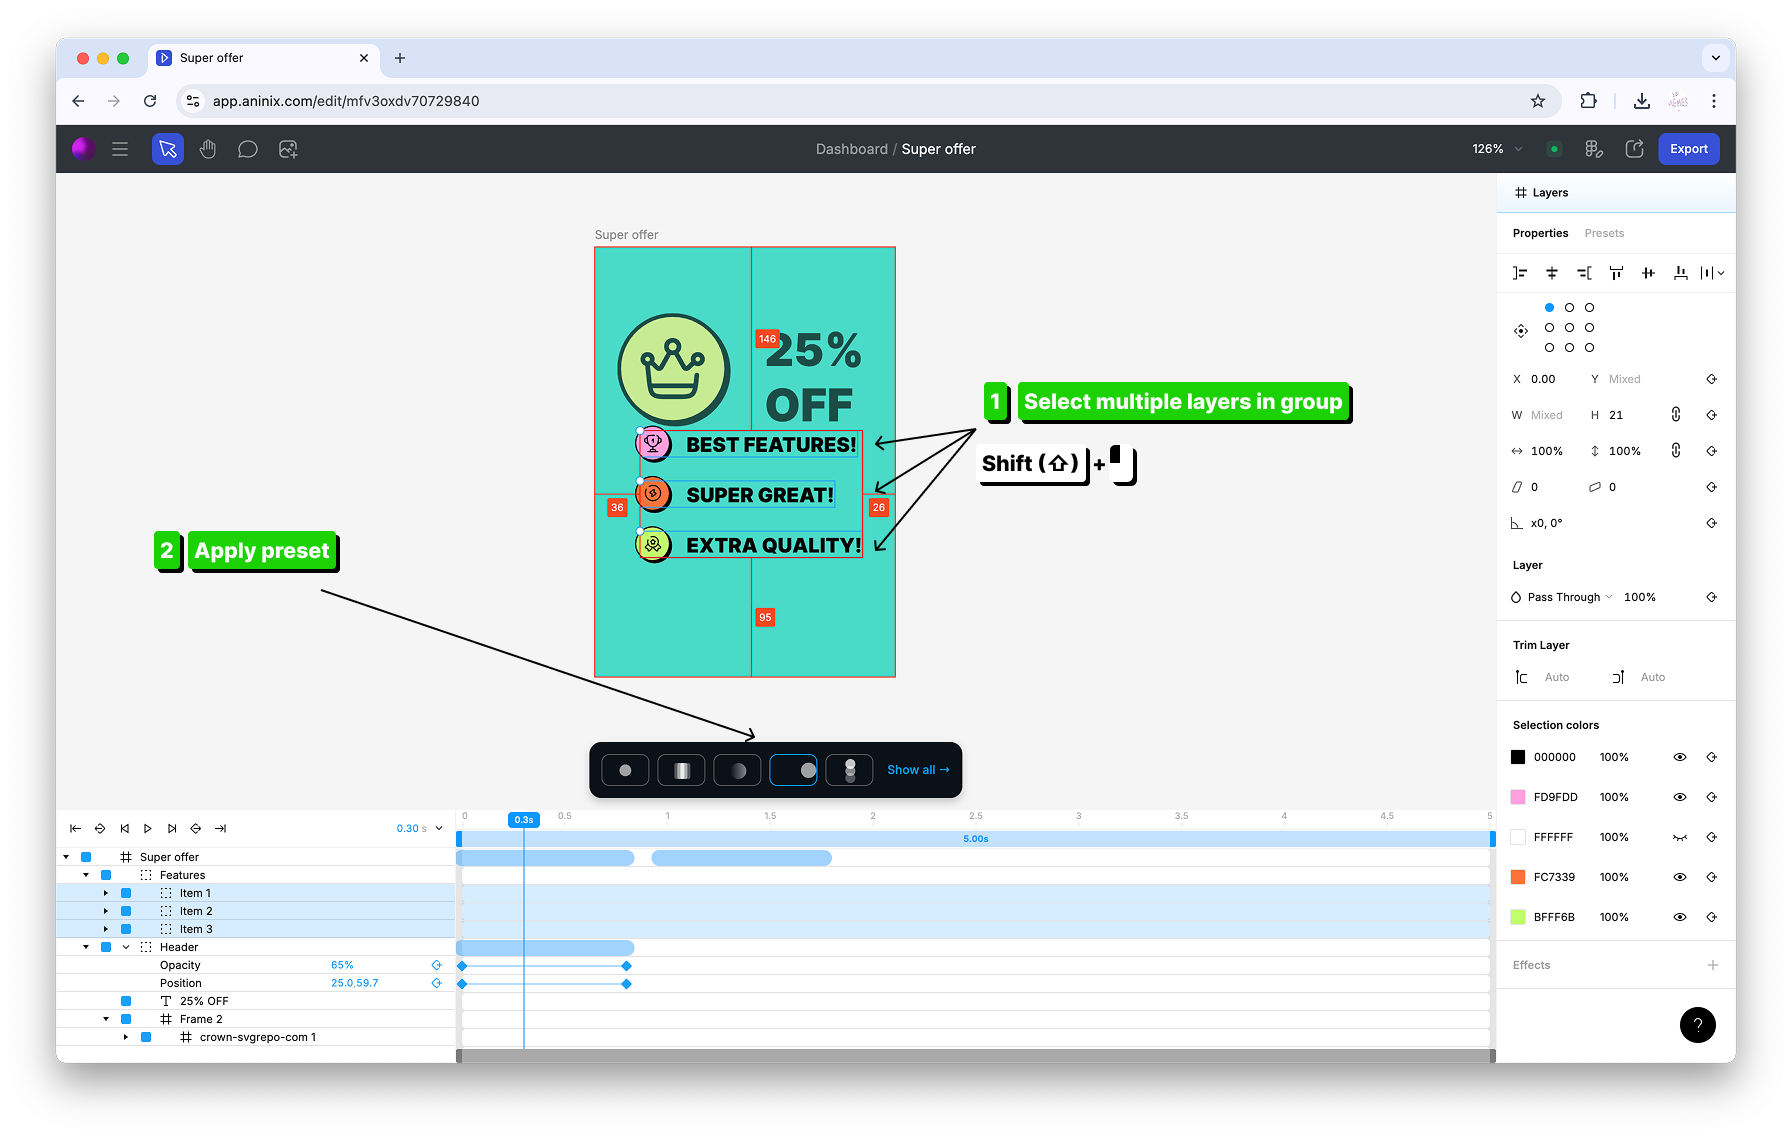
You can select multiple layers by holding `⇧ Shift` and clicking with your mouse on each element you want to include in the animation.
4. With multiple elements selected, apply presets from the Quick Presets popup
The selected preset animation will be applied to all your selected elements simultaneously.
5. Adjust your project duration to fit your animation by using the timeline controls
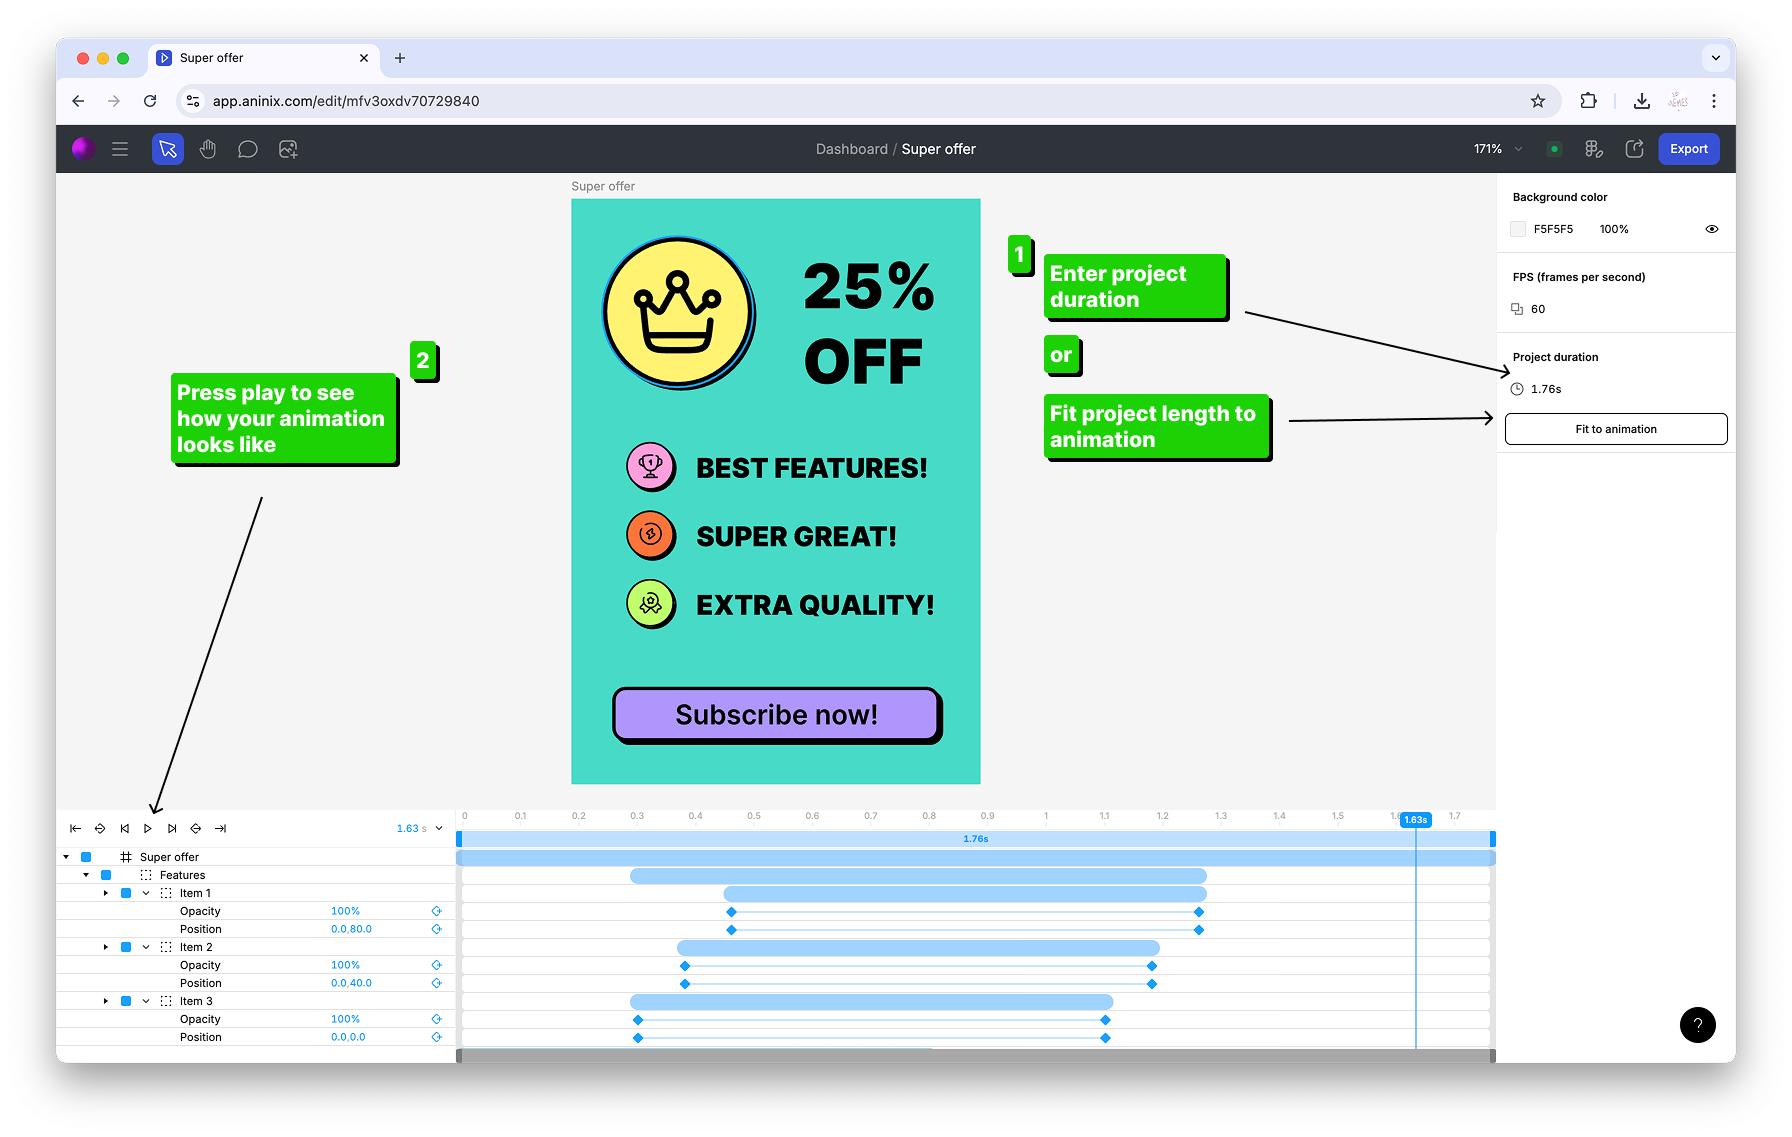
You can change the project duration to ensure your animation timing matches your desired length and all keyframes fit properly within the timeline.
## Step 3: Sync Changes
1. Open the Aninix plugin in your Figma project
2. Select the layer or frame you want to sync changes for
3. Click the `Sync changes` button in the plugin interface
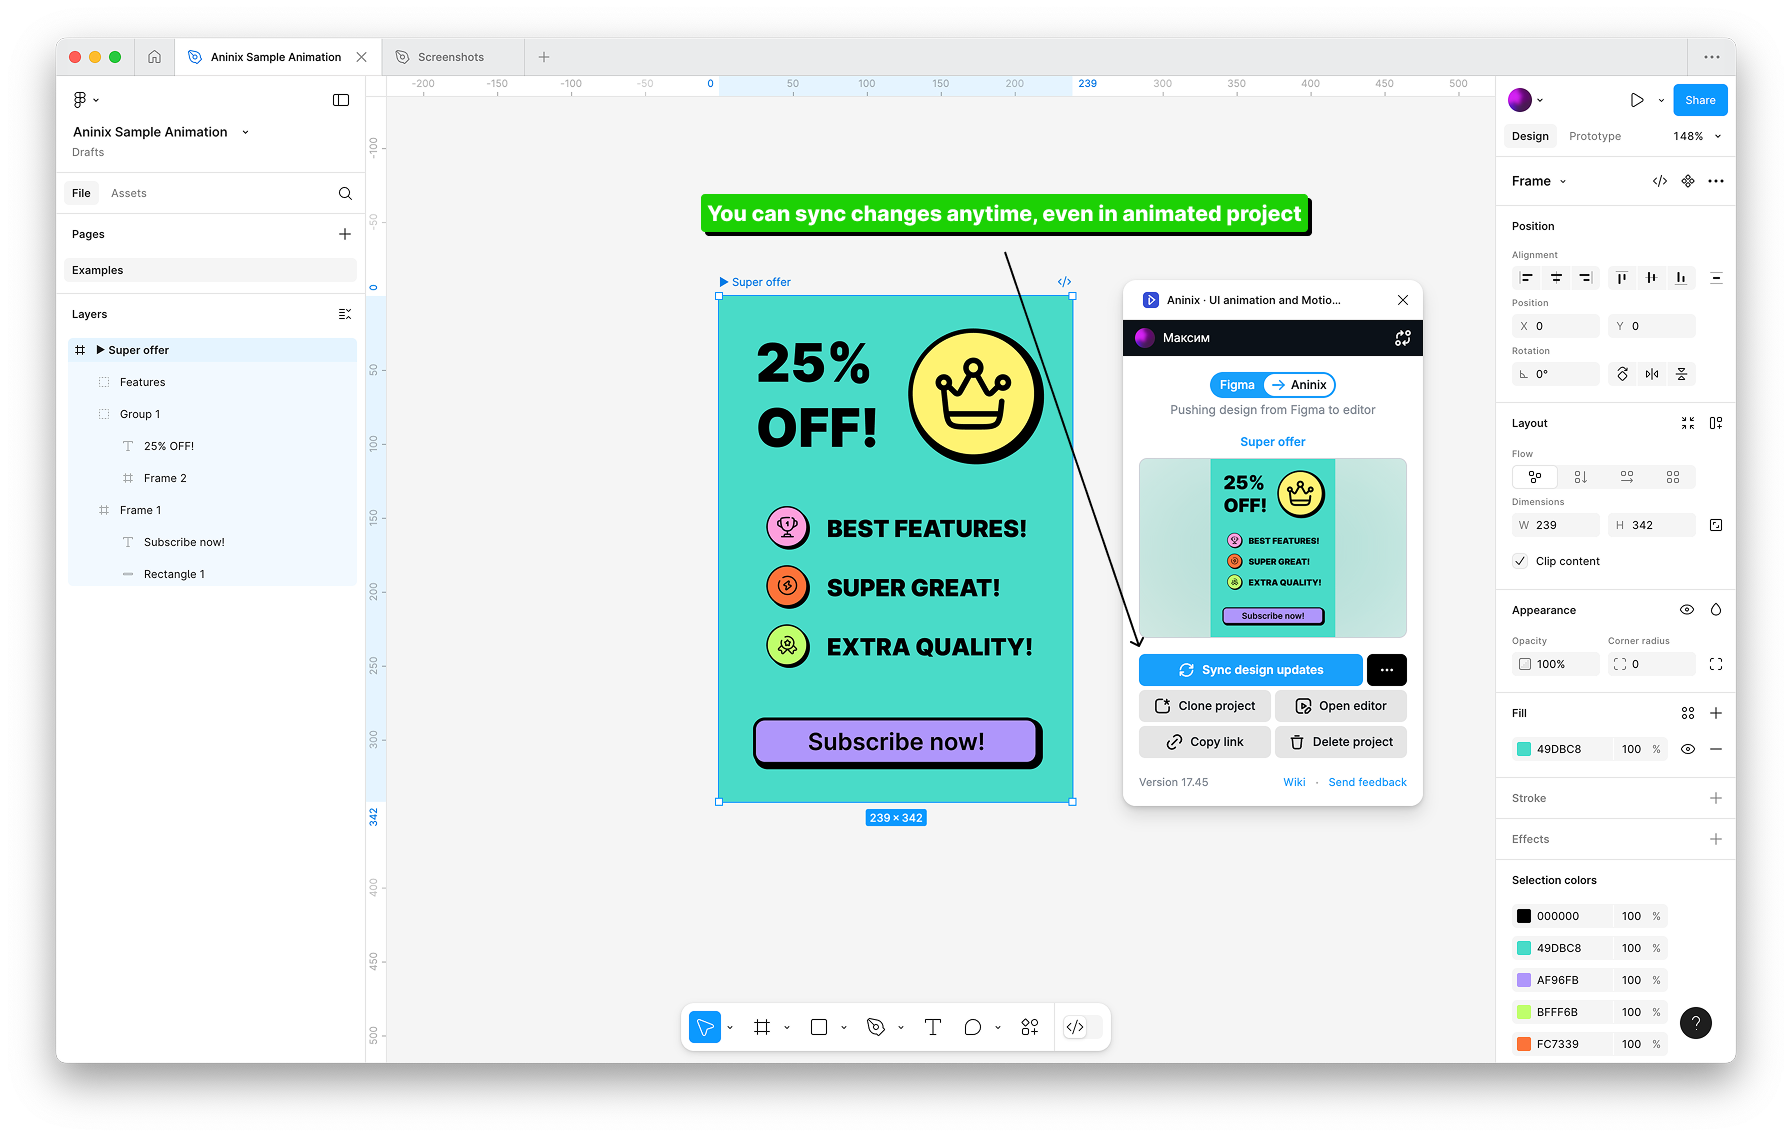
4. After syncing, you can either:
- Click `Open editor` button to continue editing in the plugin, or
- Return to your project at app.aninix.com to see the updated animation

5. Your changes will be automatically synchronized between Figma and your Aninix project
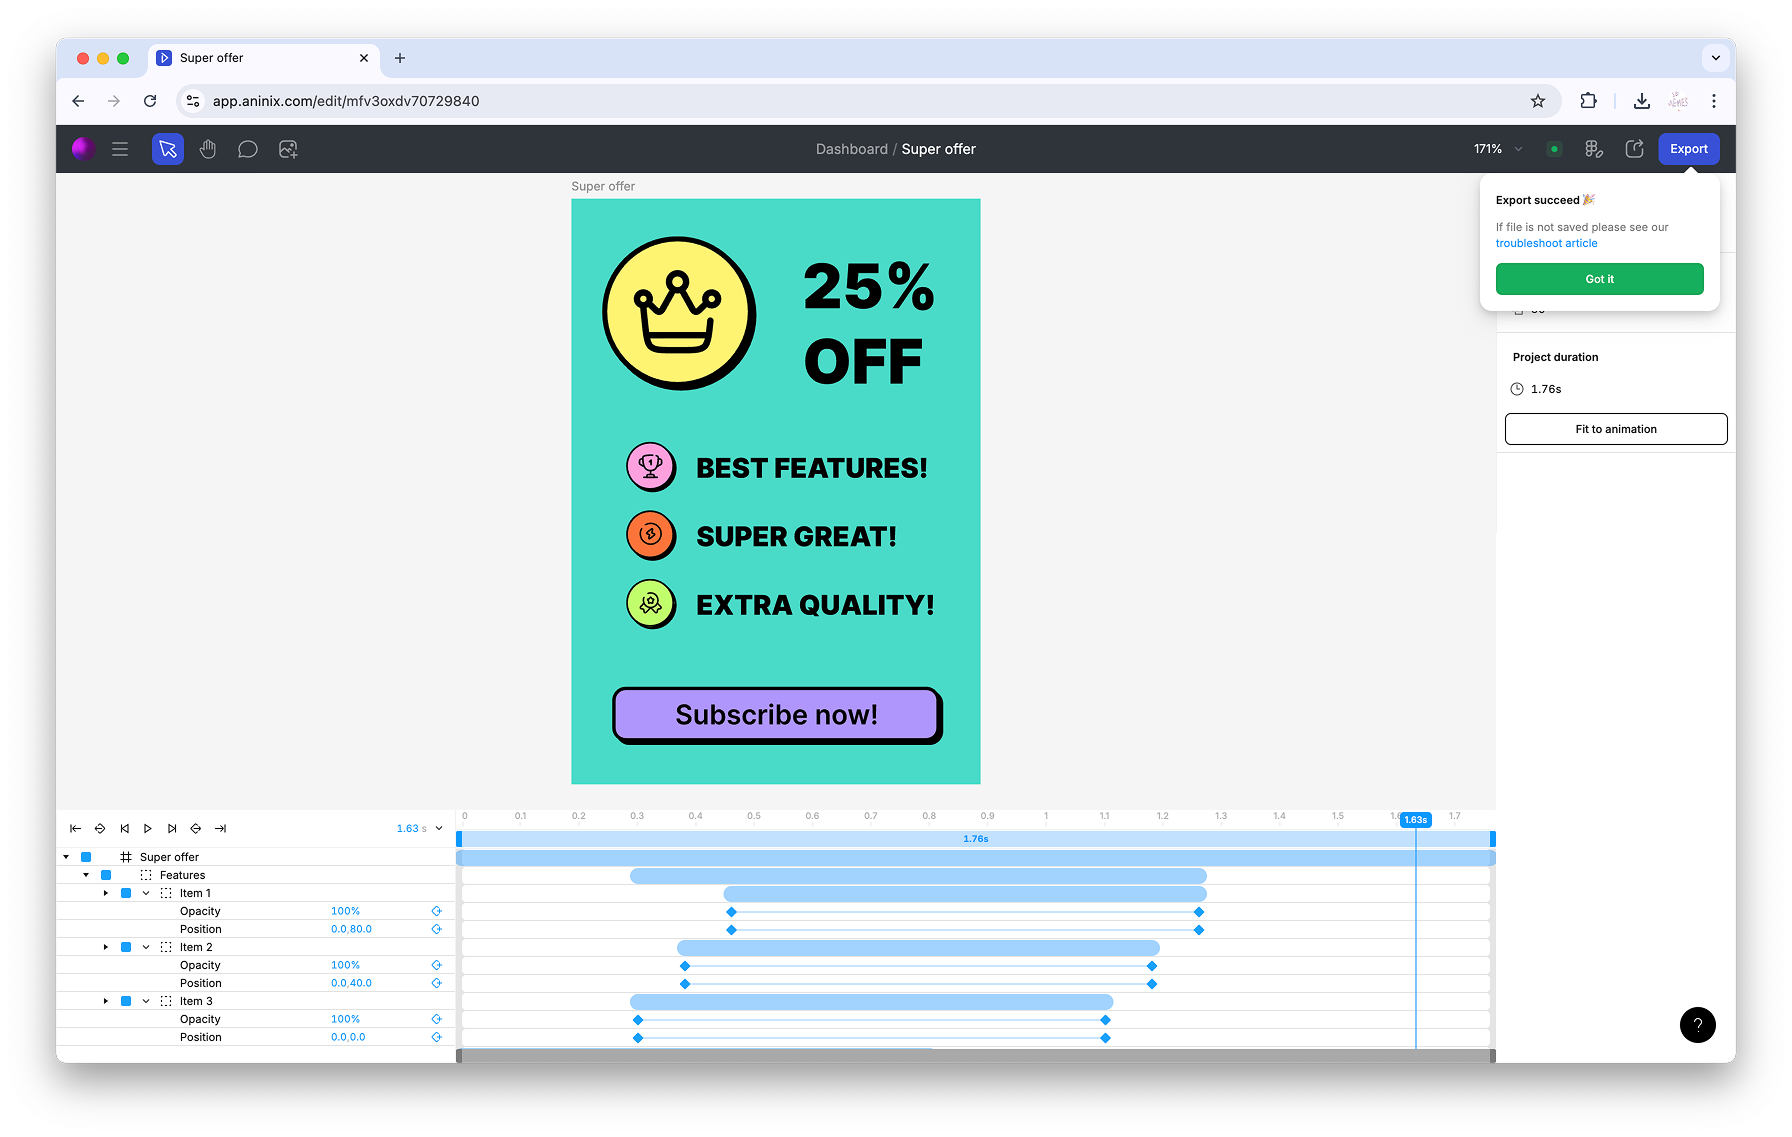
## Step 4: Export File Format
1. Click the `Export` button in the top toolbar

2. In the export options dialog, click on the format dropdown menu

3. Choose GIF for social media ads or MP4 for display ads
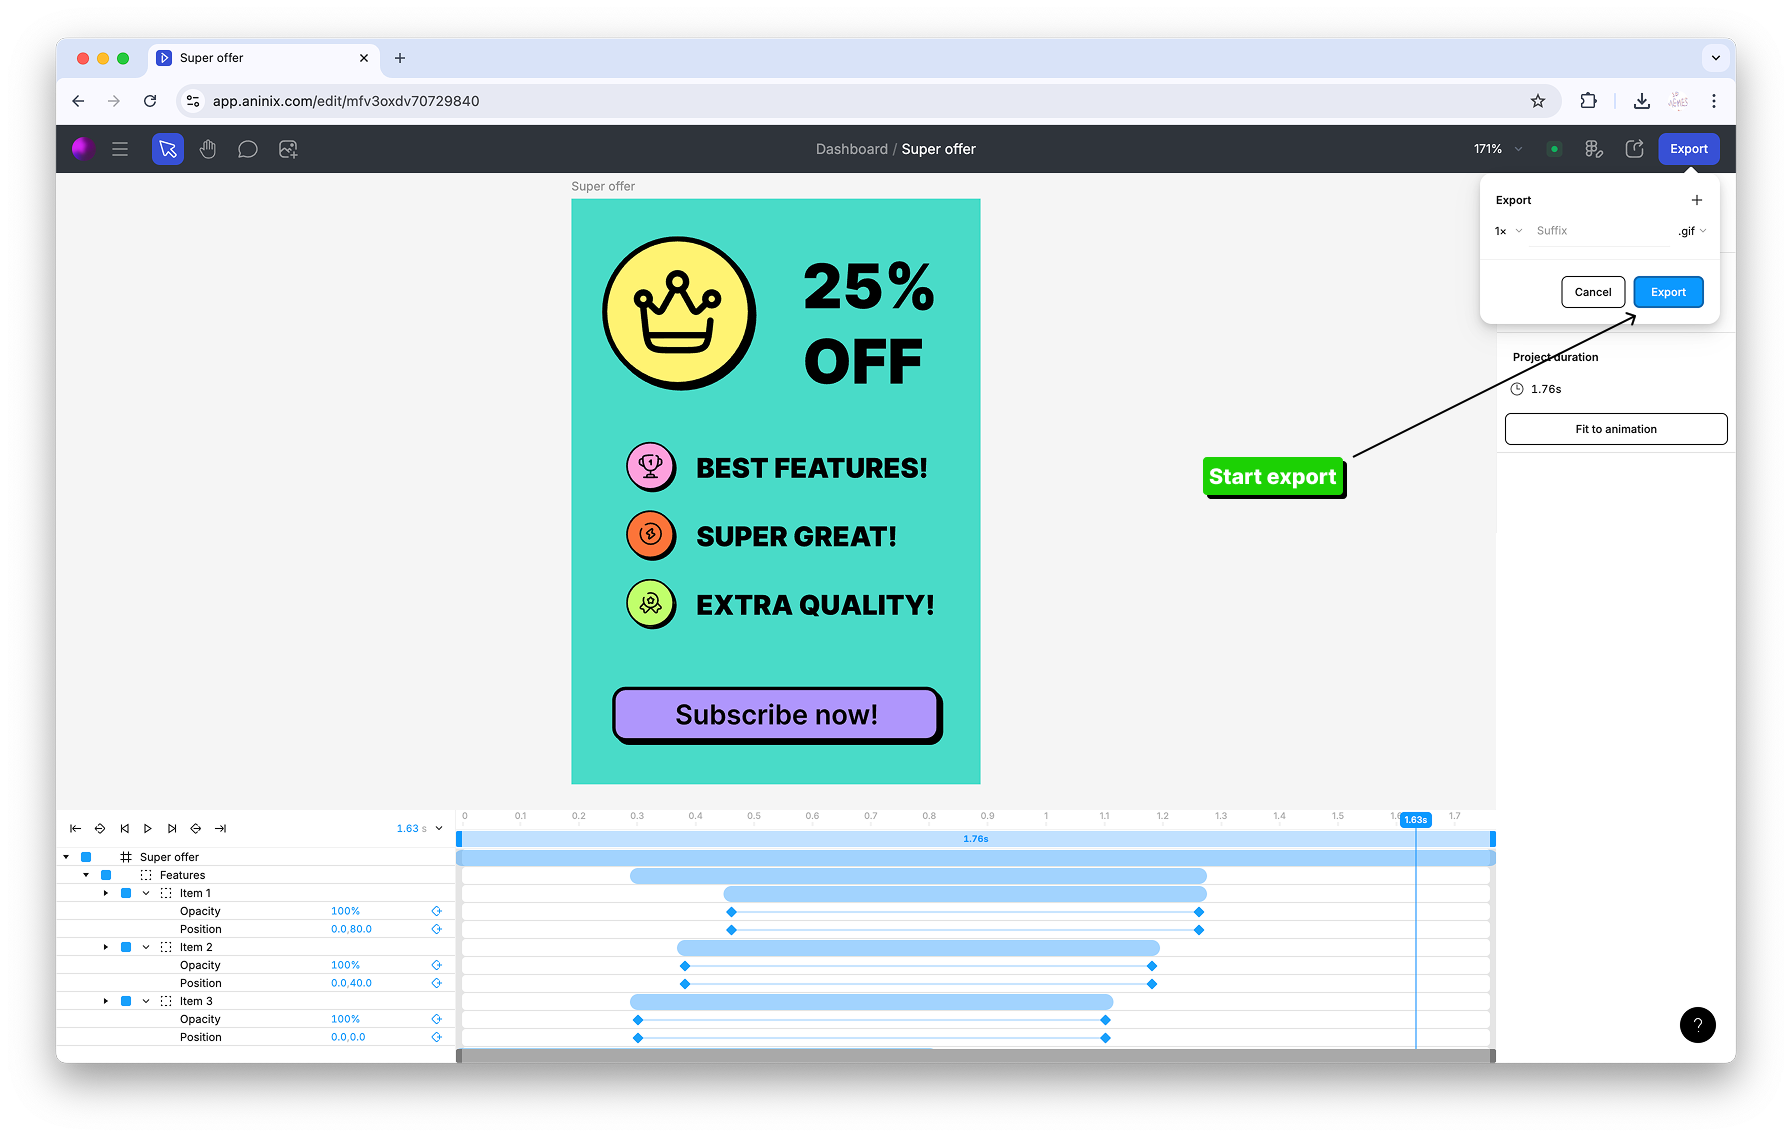
4. Configure file size and quality for ad platform requirements
5. Click `Save` to export your animation
Keywords: `animated ad creatives`, `marketing animation`, `social media ads`, `display ads`, `ad animation`, `promotional animation`, `marketing graphics`, `animated banners`
© 2021-2026 Aninix Inc. All rights reserved
© 2021-2026 Aninix Inc. All rights reserved