Import Your Design to Aninix: Complete Guide for Figma and SVG Files
Import Your Design to Aninix: Complete Guide for Figma and SVG Files
# Import Your Design to Aninix: Complete Guide for Figma and SVG Files
**Next:** [Create Your First Animation with Quick Presets](https://aninix.com/guides/create-animation-with-presets)
Welcome to your first step in creating beautiful animations with Aninix! Whether you're working with Figma designs or SVG files, this guide will walk you through importing your design into Aninix's animation editor.
## Import from Figma Plugin
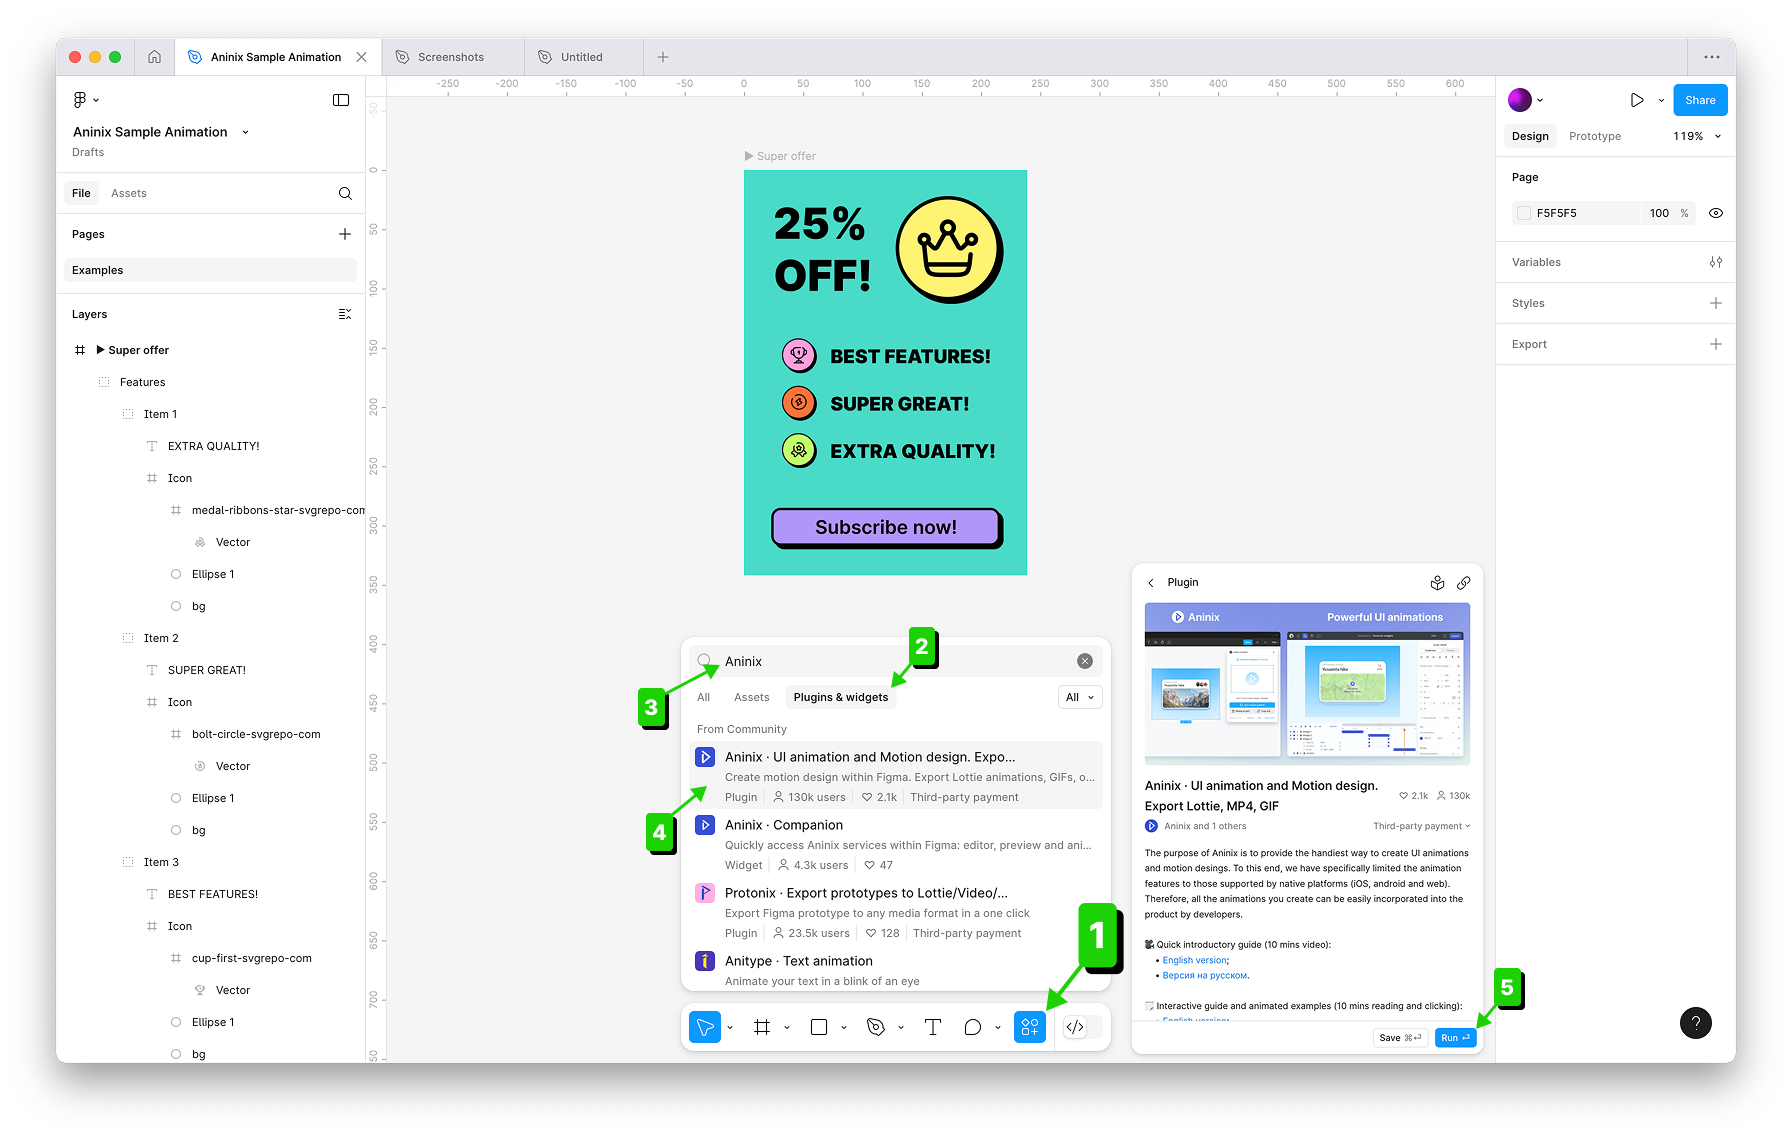
### Step 1: Install and Access the Aninix Plugin
1. Press `Actions` button in bottom Toolbar section
2. Choose `Plugins & widgets` section
3. Type `Aninix` in search bar
4. Click `Aninix • UI animation` plugin
5. Click `Run` button
### Step 2: Select Your Frame
When you first open the plugin menu, you'll see Aninix initial screen:
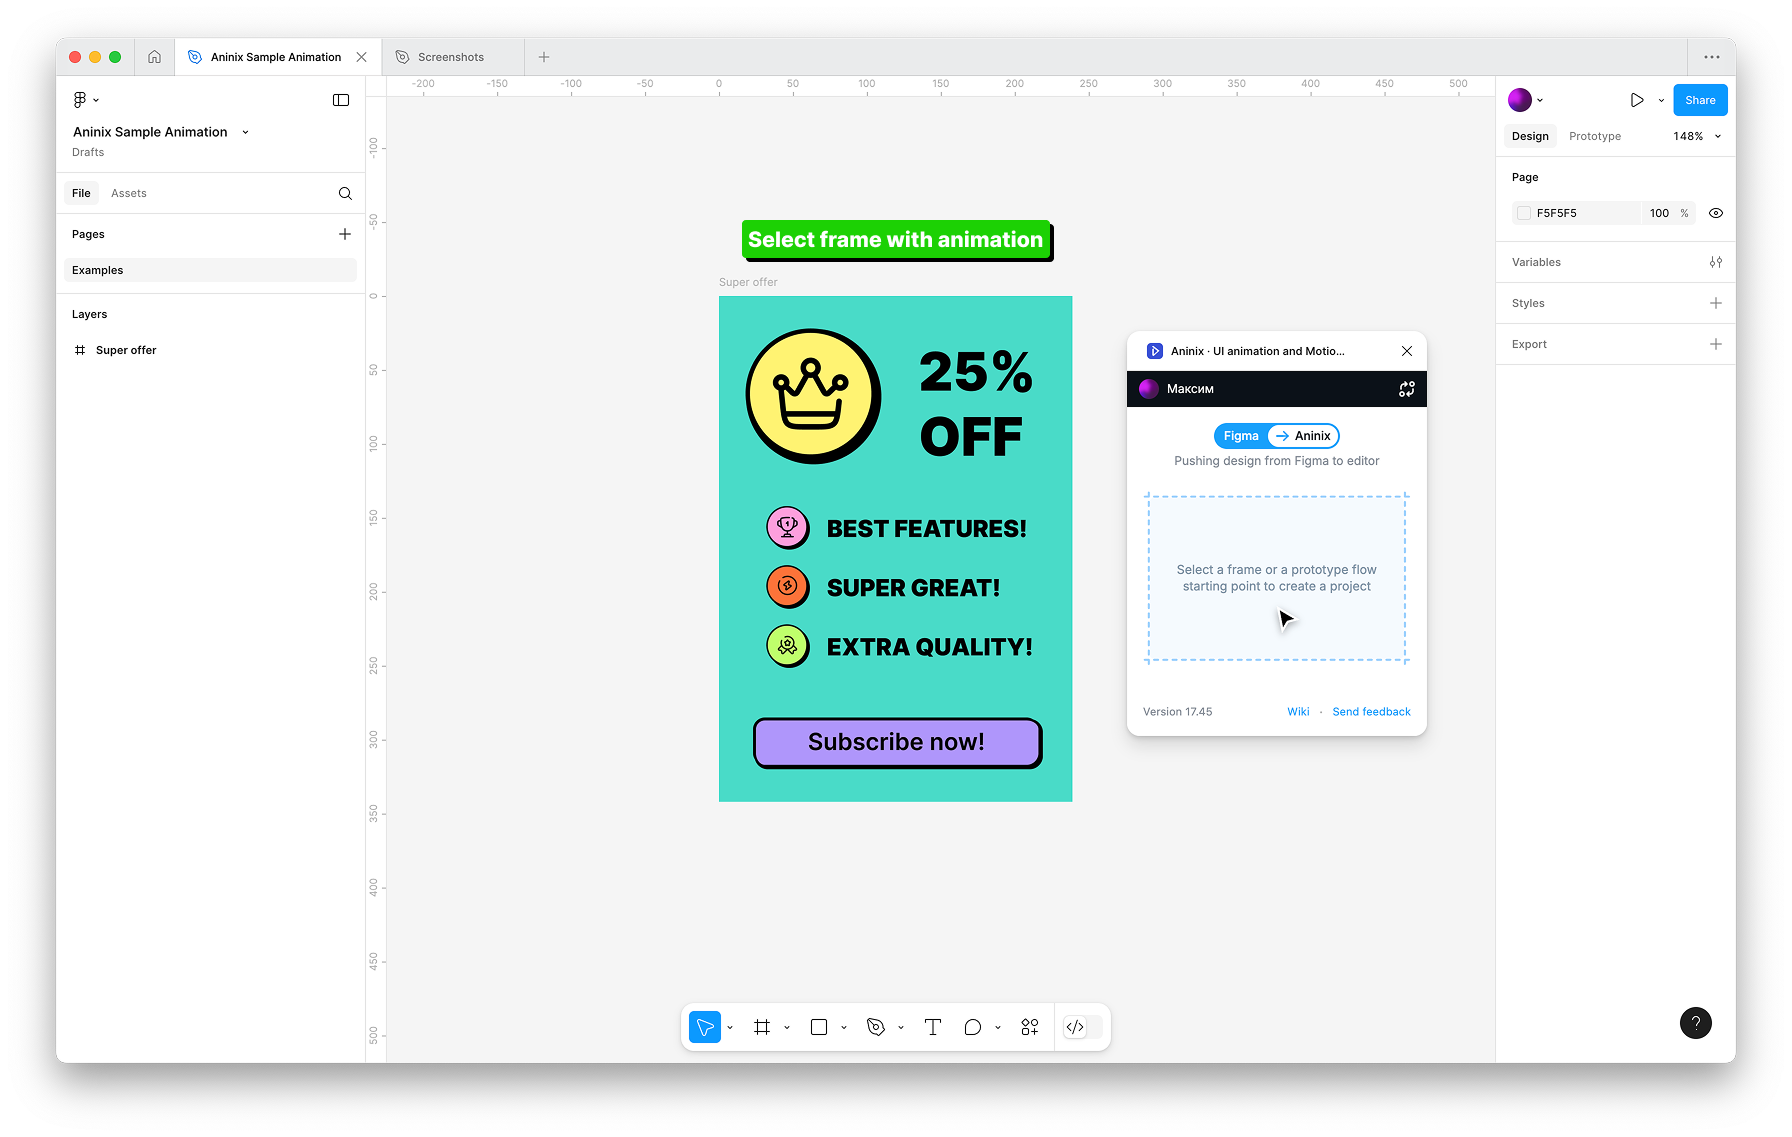
Select any frame in your Figma design that you want to animate:
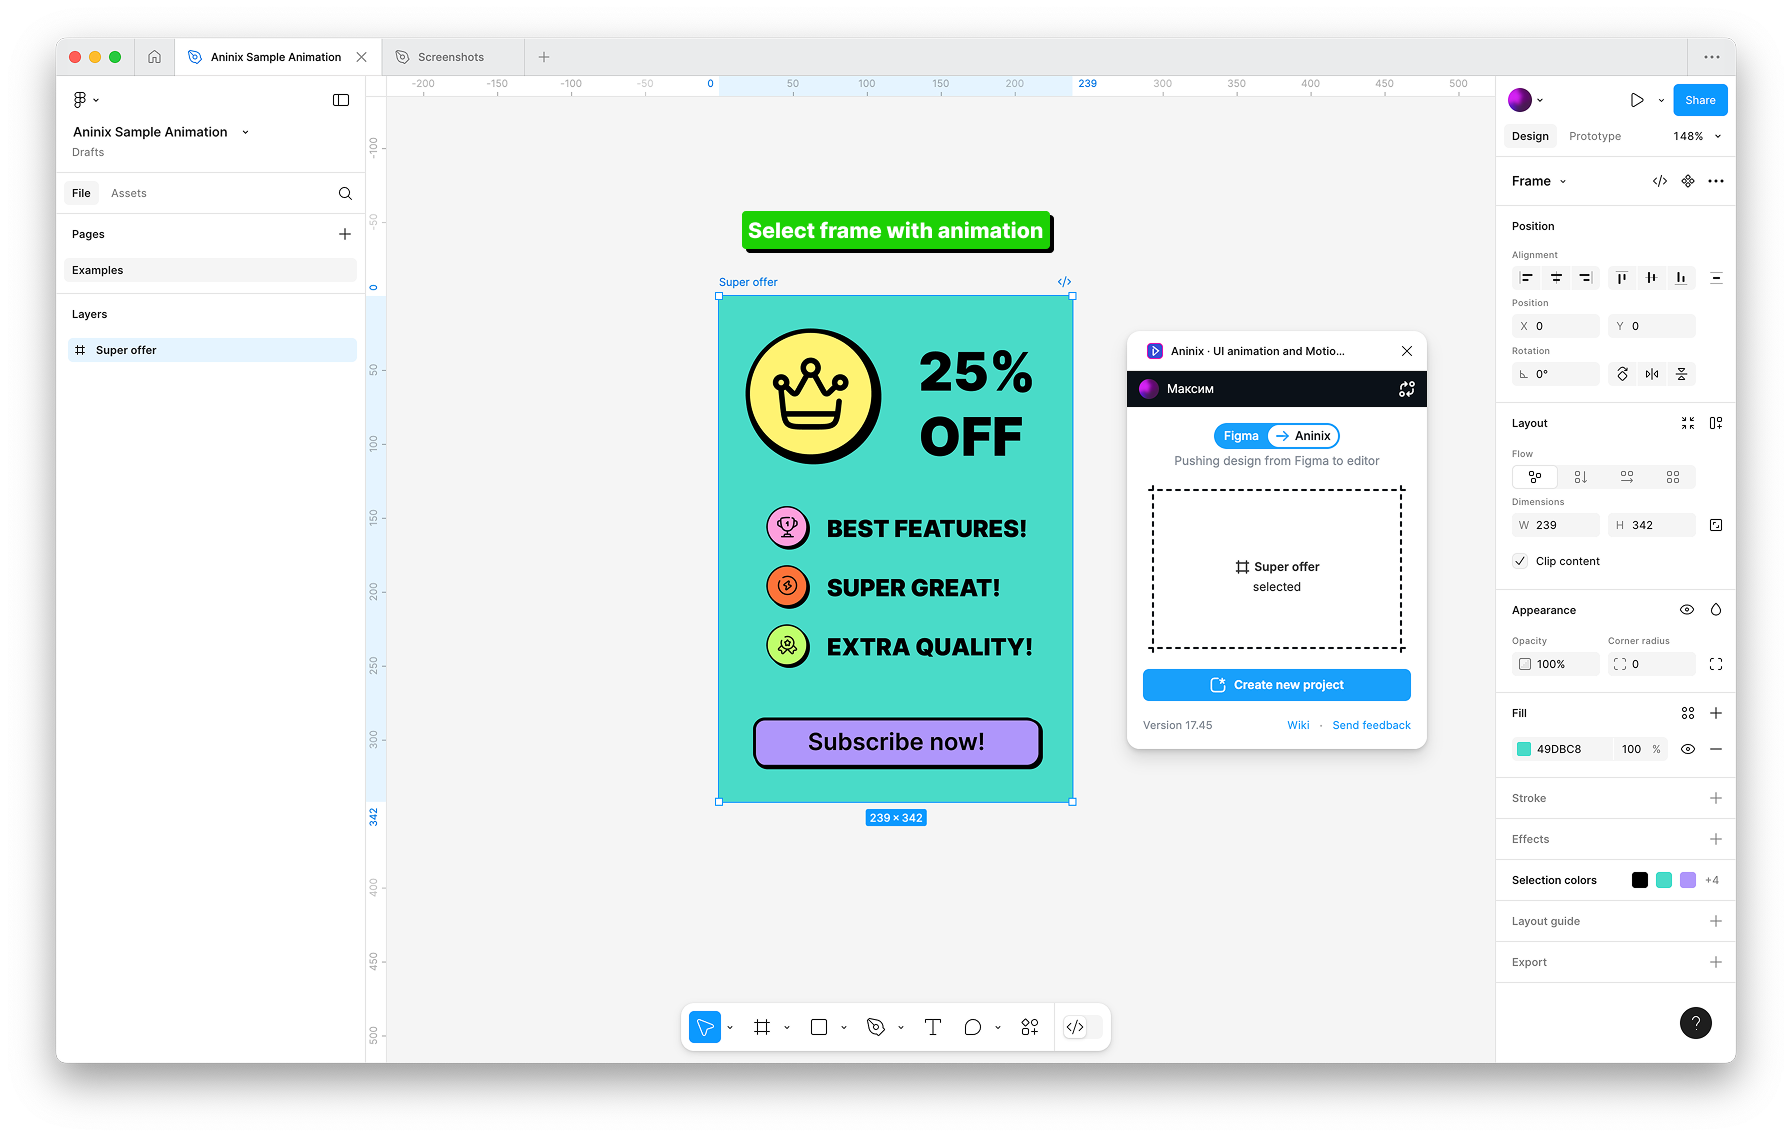
### Step 3: Create Your Project
Aninix will automatically detect what you've selected and your design will appear in the workspace. Press `Create new project` to proceed to the animation editor.
## Import from SVG File
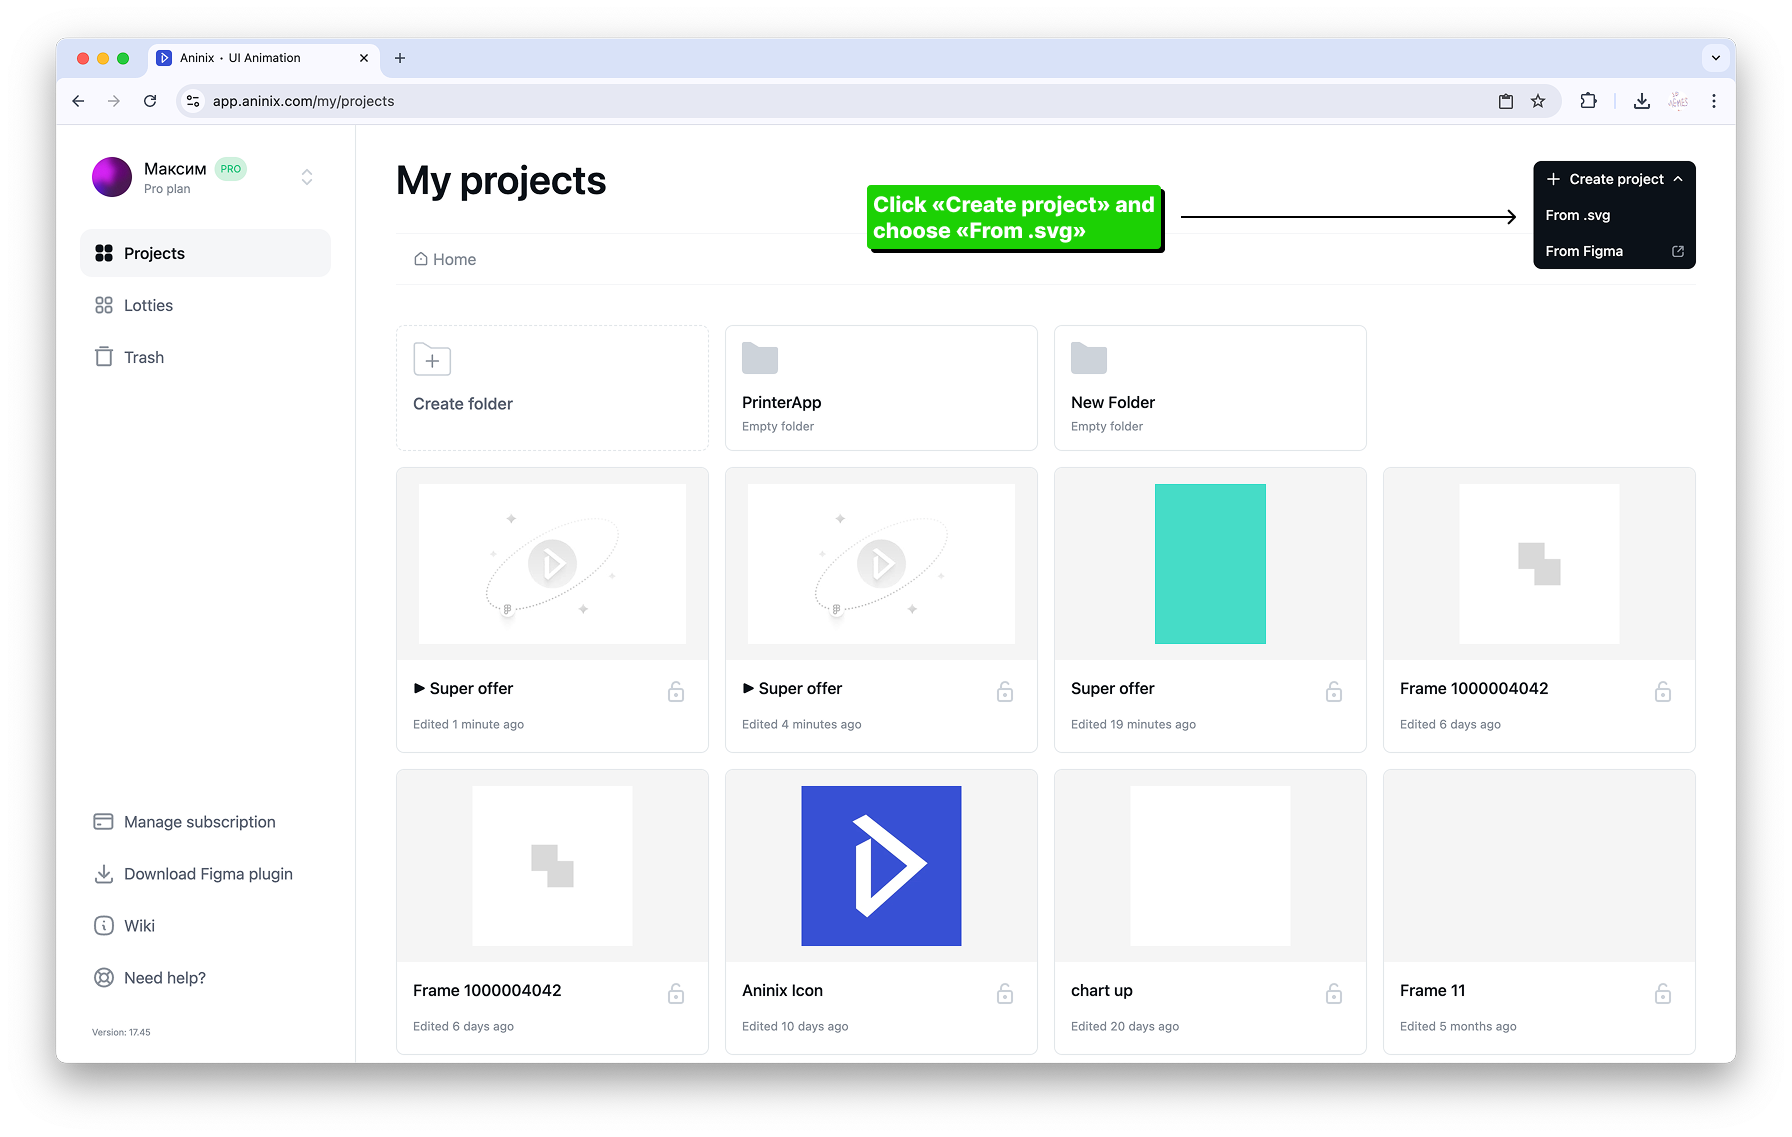
### Step 1: Access Aninix Web App
1. Go to [app.aninix.com](https://app.aninix.com) and click on `Create project`
### Step 2: Choose SVG Import
2. Choose `From .svg` option to import your SVG file
### Step 3: Upload Your File
3. Select your SVG file from your computer and upload it
4. Aninix will automatically process your SVG and create a new project with your design ready for animation
## What's Next?
Once you've successfully imported your design, you'll see the editor workspace with your design elements ready for animation.
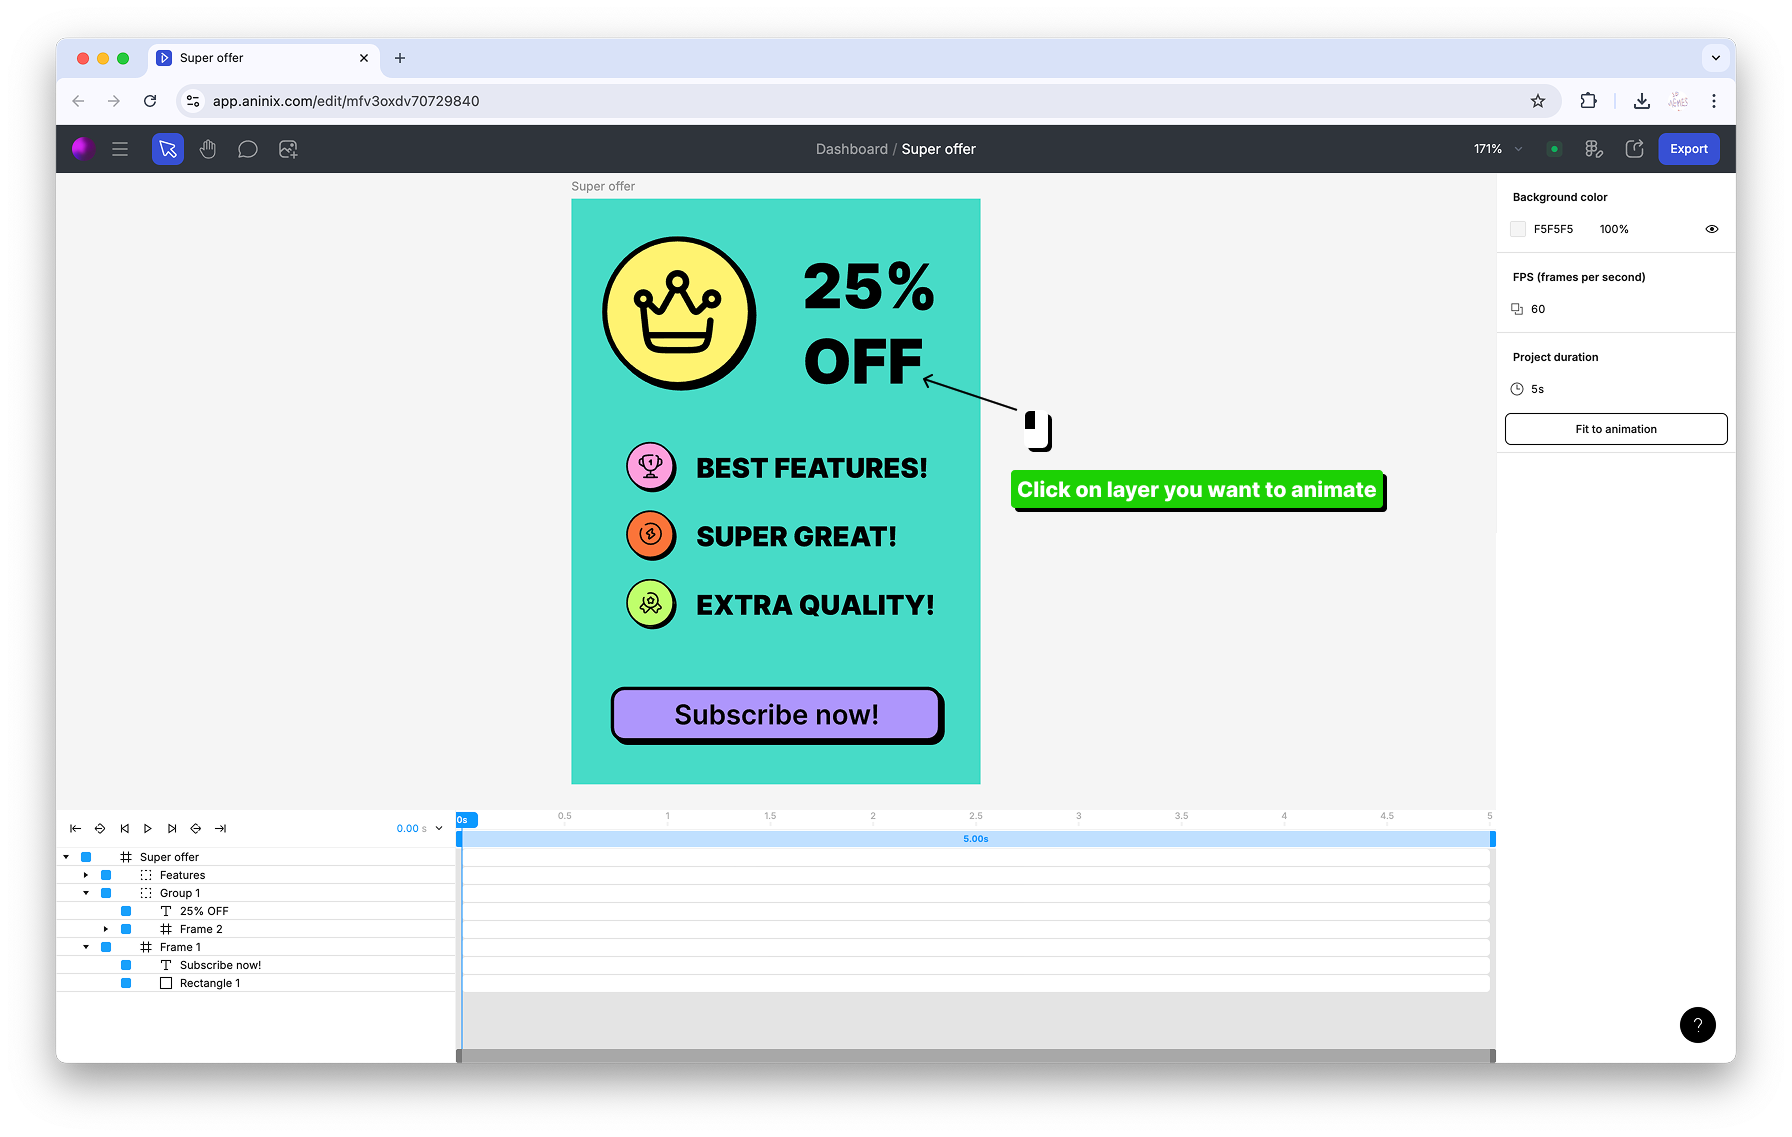
Your design is now ready to be animated! In the next guide, you'll learn how to [create your first animation using Quick Presets](https://aninix.com/guides/create-animation-with-presets), which is the fastest way to add professional animations to your elements.
**Tip:** If you need to make changes to your Figma design later, you can easily [sync changes](https://aninix.com/guides/sync-changes) to update your animation project.
---
- **Next:** [Create Your First Animation with Quick Presets](https://aninix.com/guides/create-animation-with-presets)
© 2021-2026 Aninix Inc. All rights reserved
© 2021-2026 Aninix Inc. All rights reserved