Sync Changes
Sync Changes
# Sync Changes: Keep Your Figma Design and Aninix Animation in Perfect Harmony
**Previous:** [Share Animation with Developer](https://aninix.com/guides/share-animation-with-developer) | **Next:** [Import Your Design to Aninix](https://aninix.com/guides/import-design-to-aninix)
Design is an iterative process, and your animations should evolve with your designs. The sync changes feature ensures your Aninix animations stay perfectly aligned with your latest Figma designs, even after you've started animating.
## Why Sync Changes?
Design workflows are rarely linear. You might need to:
- **Update colors or typography** after creating animations
- **Adjust element positioning** based on feedback
- **Add new elements** to your animated design
- **Modify existing elements** while preserving animations
The sync changes feature handles all of these scenarios seamlessly.
## When to Use Sync Changes
Use sync changes when you've:
- Modified elements in your original Figma design
- Added new layers or components
- Changed colors, fonts, or styling
- Adjusted positioning or sizing of elements
- Made any visual updates that should reflect in your animation
## Step 1: Open the Aninix Plugin
Return to your original Figma project where you created the design that's now animated in Aninix. Open the Aninix plugin from the plugins menu.
## Step 2: Select Your Layer or Frame
Select the specific layer or frame that you want to sync changes for. This should be the same layer/frame that you originally used to create your Aninix project.
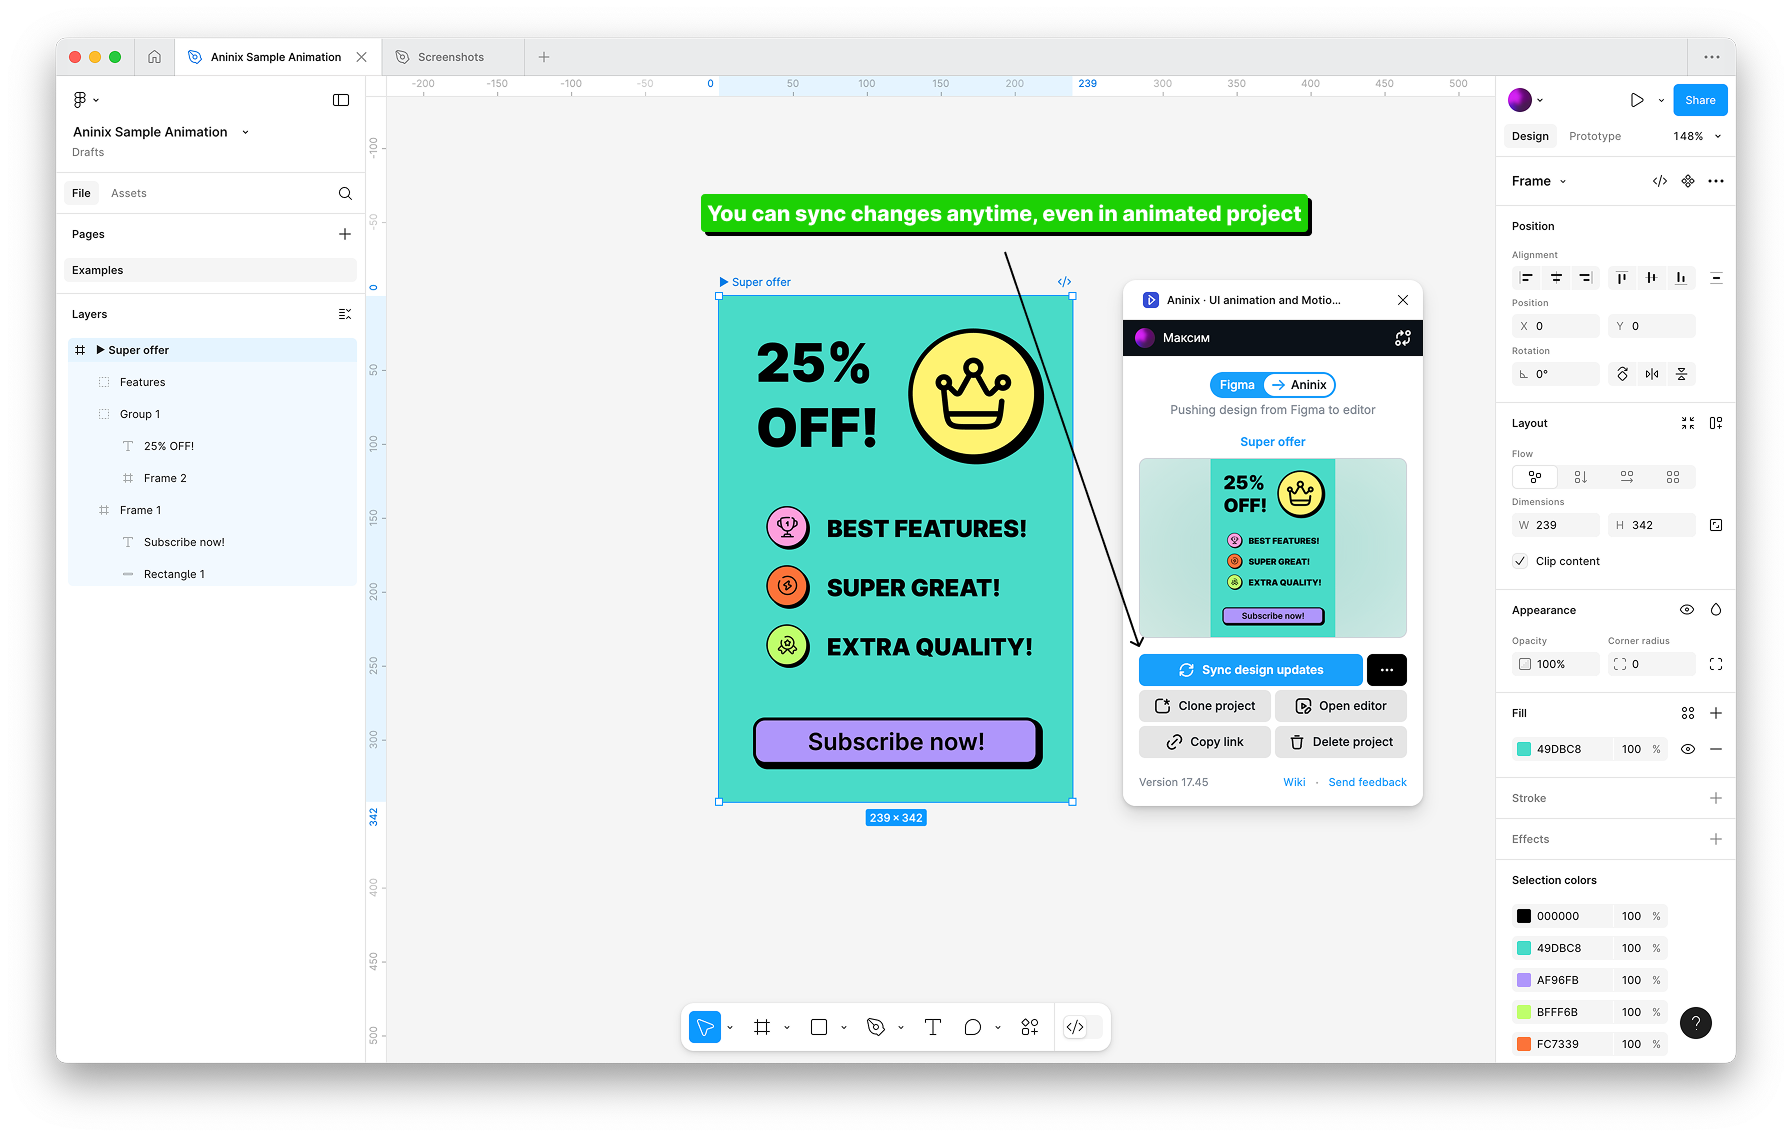
## Step 3: Sync Your Changes
Click the `Sync changes` button in the plugin interface. The plugin will automatically detect and sync any visual changes from your Figma design to your Aninix project.
## Step 4: Choose Your Next Action
After syncing, you have two options:
**Option A: Continue in Plugin**
- Click `Open editor` button to continue editing directly in the Figma plugin
- Perfect for quick adjustments and immediate animation updates
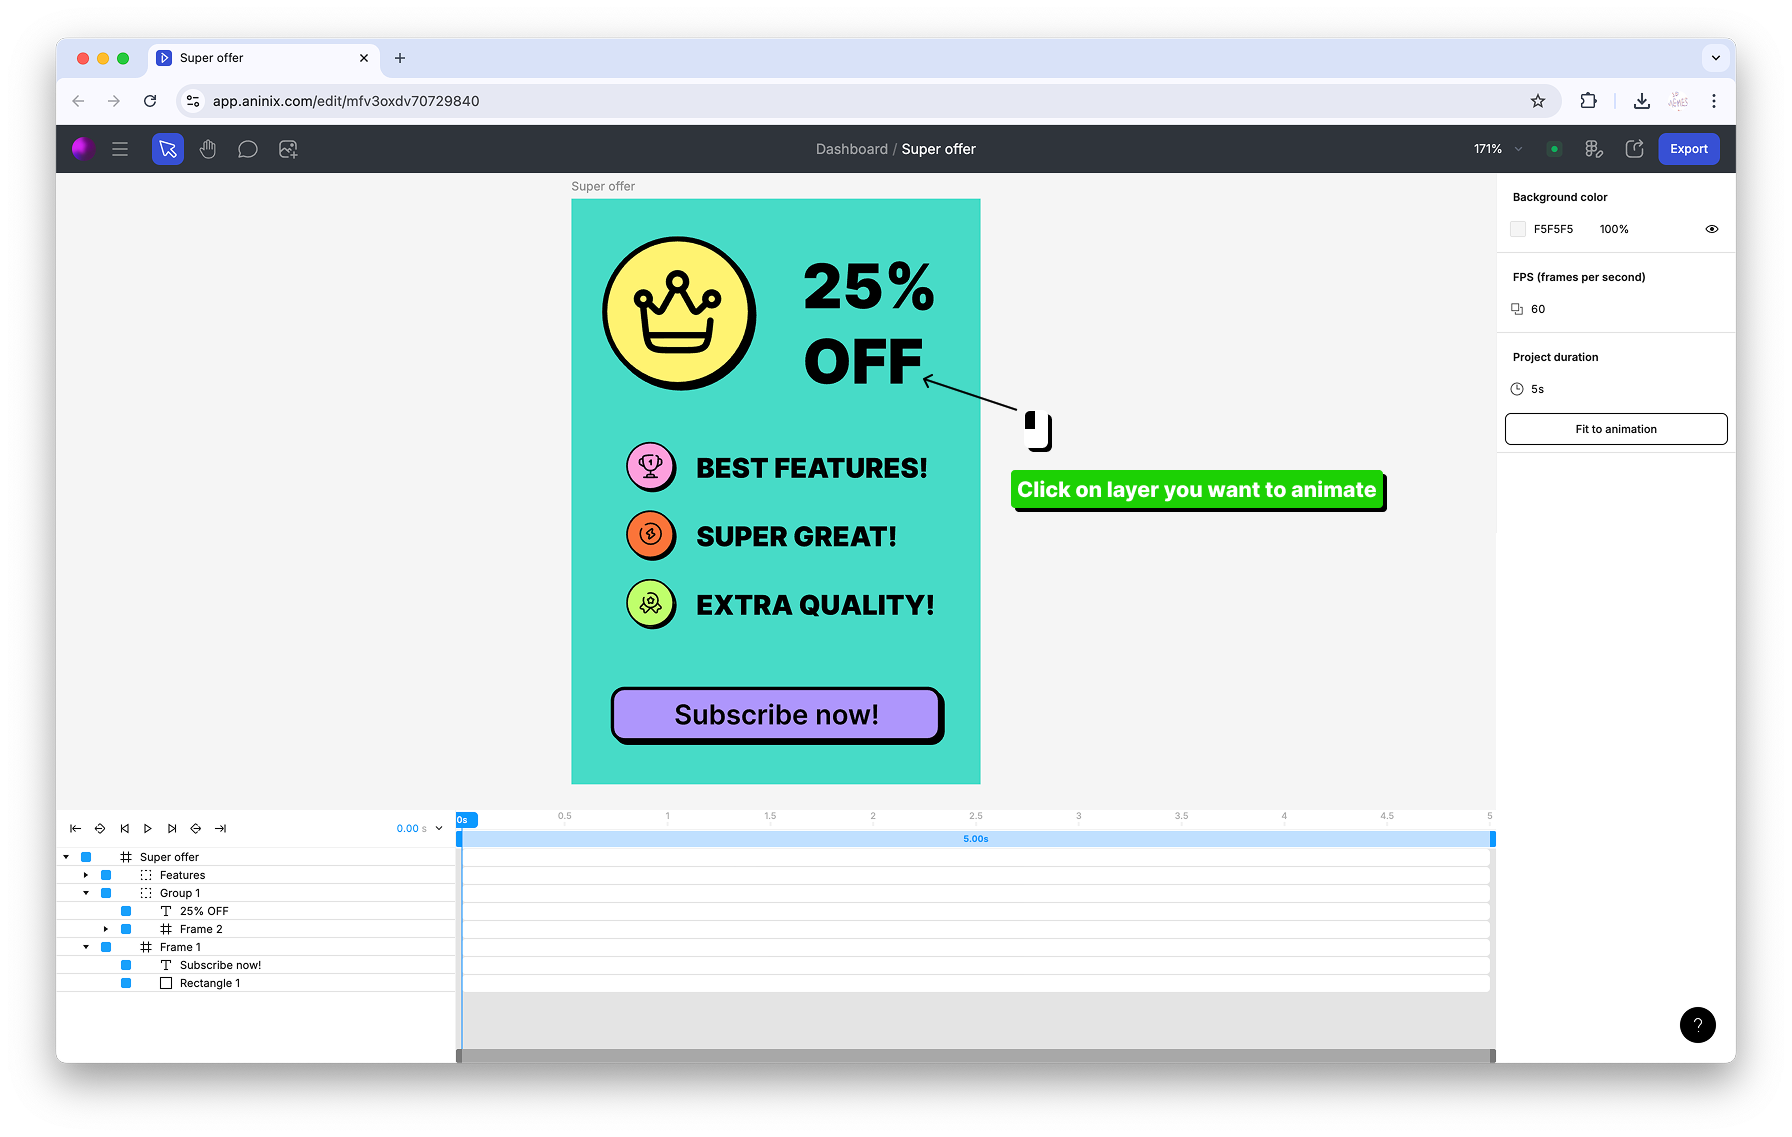
**Option B: Return to Browser**
- Return to your Aninix project in the browser to see the updated animation
- Ideal for complex animation work and full editor features
## Step 5: Verify Your Updates
Your changes will be automatically synchronized between Figma and your Aninix project. All existing animations will be preserved while visual elements are updated to match your latest design.
## What Gets Synced?
### Visual Properties
- **Colors and fills** including gradients and patterns
- **Typography** including font family, size, and weight
- **Element dimensions** and positioning
- **Layer effects** like shadows and blurs
- **Image updates** and asset changes
### Animation Properties Preserved
- **Keyframes** and timing remain intact
- **Animation curves** and easing functions
- **Layer relationships** and hierarchies
- **Custom animation settings** and configurations
## Sync Changes Best Practices
### Before Syncing
- **Save your Figma file** to ensure all changes are captured
- **Review your changes** to understand what will be updated
- **Consider animation impact** of major structural changes
### After Syncing
- **Preview your animation** to ensure everything looks correct
- **Check timing and easing** if elements have significantly changed
- **Update keyframes** if new positioning requires animation adjustments
- **Test all animation states** to ensure smooth transitions
## Troubleshooting Common Issues
**Sync Not Working?**
- Ensure you're selecting the correct layer/frame
- Verify the Figma file has been saved
- Check that you have edit permissions for the Aninix project
**Animations Look Different?**
- Large positional changes may require keyframe adjustments
- New elements won't have animations until you add them
- Deleted elements will be removed from animations automatically
**Missing Elements?**
- Ensure all layers are visible in Figma
- Check that layer names haven't changed significantly
- Verify that grouped elements are properly structured
## Advanced Sync Scenarios
### Adding New Elements
When you add new elements to your Figma design:
1. Sync changes as usual
2. New elements will appear in your Aninix project
3. Apply animations to new elements using presets or keyframes
4. Existing animations remain unaffected
### Restructuring Designs
For major design restructuring:
1. Sync changes to update visual elements
2. Review all animations for proper element targeting
3. Adjust keyframes if element relationships have changed
4. Test the complete animation sequence
## Integration with Developer Handoff
After syncing changes, your [developer handoff specifications](https://aninix.com/guides/share-animation-with-developer) will automatically update to reflect the new design. This ensures developers always have access to the most current animation specifications.
## What's Next?
Now that you know how to keep your designs and animations in sync, you might want to:
- Learn more about [sharing animations with developers](https://aninix.com/guides/share-animation-with-developer) for seamless implementation
- Explore [different export formats](https://aninix.com/guides/export-animation-formats) for your updated animations
- Go back to the basics with [importing designs to Aninix](https://aninix.com/guides/import-design-to-aninix)
---
- **Next:** [Import Your Design to Aninix](https://aninix.com/guides/import-design-to-aninix)
© 2021-2026 Aninix Inc. All rights reserved
© 2021-2026 Aninix Inc. All rights reserved